
 Latest images
Bianca ('06 STi) A New Start
+6
LaRa PwR
9!'clipseDOHC
Submissionmonger
mikey_b6
STi2eNvy
gregroot198521
10 posters
Page 2 of 2
Page 2 of 2 • ![]() 1, 2
1, 2
![]()
 Re: Bianca ('06 STi) A New Start
![]() by STi2eNvy Tue Jan 14, 2014 8:16 pm
by STi2eNvy Tue Jan 14, 2014 8:16 pm
IM confused, I thought the STi was Bianca? You are calling her Roxie though? Nice list of parts though =)

STi2eNvy- Community Founder =)
- Posts : 1294
Reputation : 64
Join date : 2012-03-19
Age : 34
Location : El Paso, TX -

![]()
![]()
Re: Bianca ('06 STi) A New Start
![]() by gregroot198521 Sun Mar 02, 2014 1:54 am
by gregroot198521 Sun Mar 02, 2014 1:54 am
That's correct. I'm guessing you're referring to the vids, those are of Roxie, just took me forever to upload them, and still have to re-upload the third when I get back stateside, youtube doesn't allow uploading of >10min clips with out verifying the account.STi2eNvy wrote:IM confused, I thought the STi was Bianca? You are calling her Roxie though? Nice list of parts though =)
^Posted a while back. Trying to delete posts stops at someone else's, can't delete any older.
Thread has been consolidated to 4 major posts, all are on the first page now. This is in preparation for the upcoming burst of activity and updates I will be making. (Donald, if you read this, can you help me by cleaning out the posts I edited to "delete please", or allow self-deleting of previous posts?)

gregroot198521- Ol' Dirty Bastard
- Posts : 98
Reputation : 2
Join date : 2012-03-20
Age : 38
Location : North El Paso/ Main Fort Bliss
![]()
![]()
Re: Bianca ('06 STi) A New Start
![]() by gregroot198521 Mon Apr 07, 2014 9:27 pm
by gregroot198521 Mon Apr 07, 2014 9:27 pm
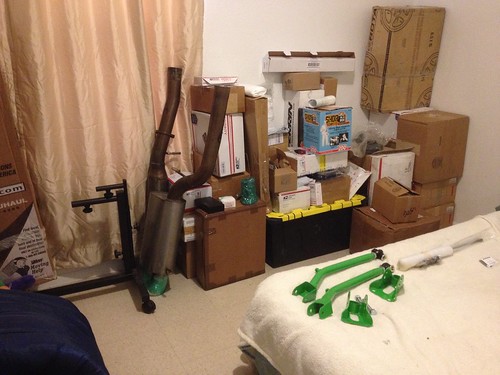
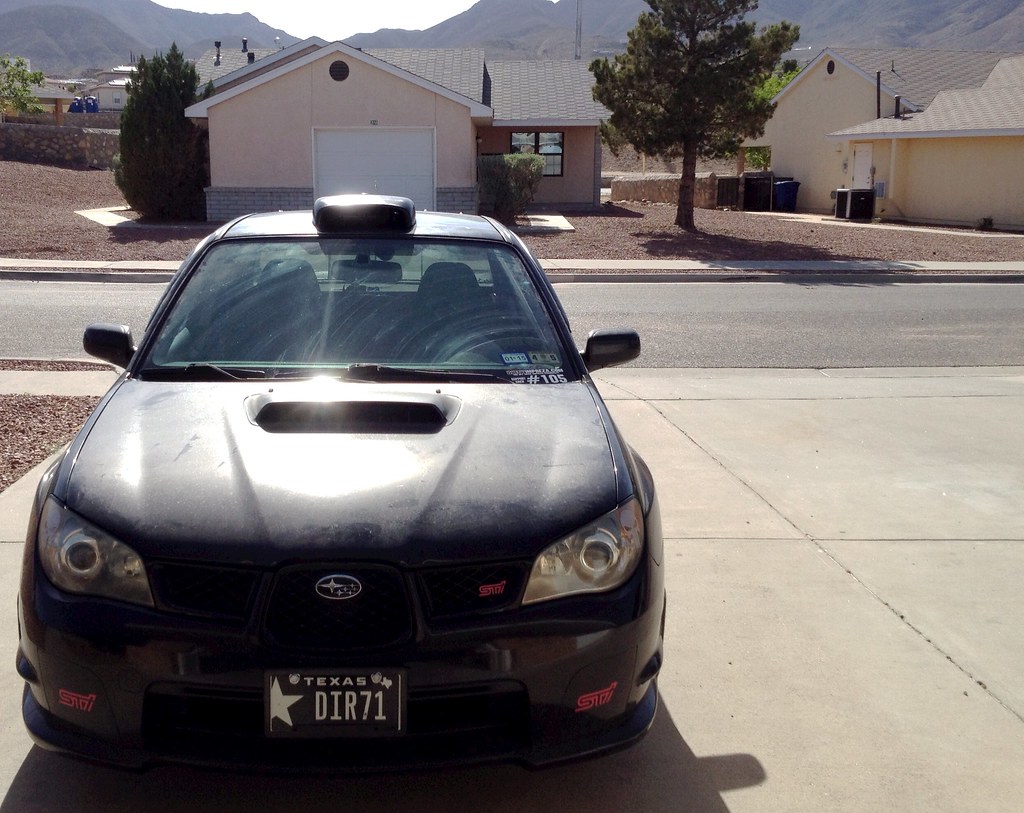
So, I have arrived back home. Got back on Wednesday but due to restrictions imposed by command I was not allowed to drive my car for 48 hours; essentially equated to not driving until Saturday when I got my Texas Safety Inspection and made the car fully legal. Picked up the new license plates on Friday with the wife. I suppose we should start with promised pics of the old which will be put in the applicable posts (read through the second progress post to see them) and a promised pic of the pile of boxes:
And now let the build commence. Started out slow with mods as I was just back (did these on Thursday and Friday while my wife was doing schoolwork); installed my JDM Hazard switch, the armrest extension and swapped out shift knobs for one that I won while I was away.

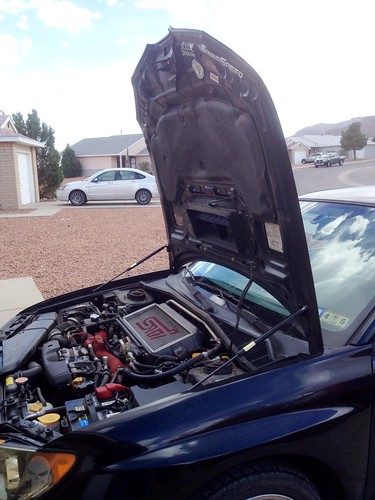
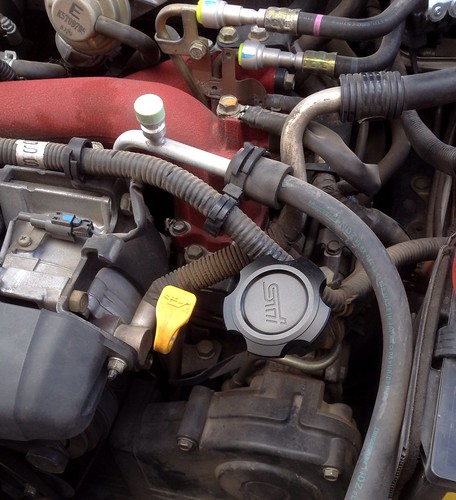
Swapped out my hood lift struts for the GrimmSpeed Hi-lift setup (very high, can barely reach the hood from the front) and swapped in the billet Aluminum oil cap.
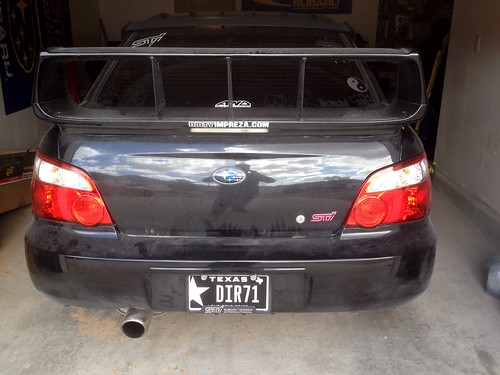
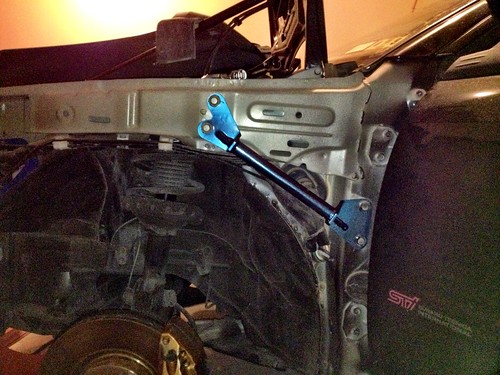
Installed the ‘04/05 taillights and my new license plates on Saturday and the repainted fender braces on Sunday:
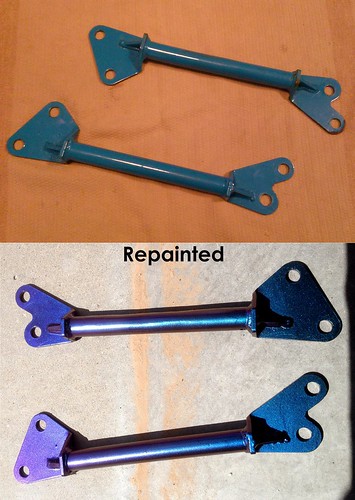
A comparison between stock and the Offensive Power fender braces:
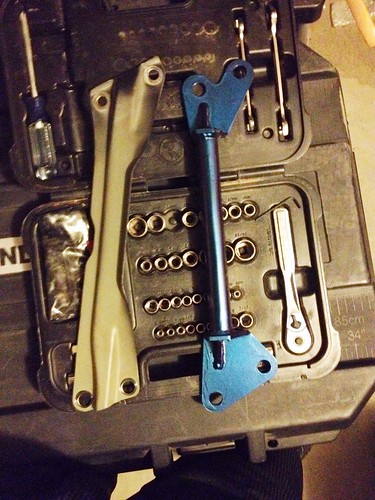
And installed (passenger side was already finished, pictures sucked worse than this one):
And now let the build commence. Started out slow with mods as I was just back (did these on Thursday and Friday while my wife was doing schoolwork); installed my JDM Hazard switch, the armrest extension and swapped out shift knobs for one that I won while I was away.
Swapped out my hood lift struts for the GrimmSpeed Hi-lift setup (very high, can barely reach the hood from the front) and swapped in the billet Aluminum oil cap.
Installed the ‘04/05 taillights and my new license plates on Saturday and the repainted fender braces on Sunday:
A comparison between stock and the Offensive Power fender braces:
And installed (passenger side was already finished, pictures sucked worse than this one):
Last edited by gregroot198521 on Sat Apr 19, 2014 4:18 pm; edited 1 time in total
gregroot198521- Ol' Dirty Bastard
- Posts : 98
Reputation : 2
Join date : 2012-03-20
Age : 38
Location : North El Paso/ Main Fort Bliss
![]()
![]()
Re: Bianca ('06 STi) A New Start
![]() by gregroot198521 Sun Apr 13, 2014 7:45 pm
by gregroot198521 Sun Apr 13, 2014 7:45 pm
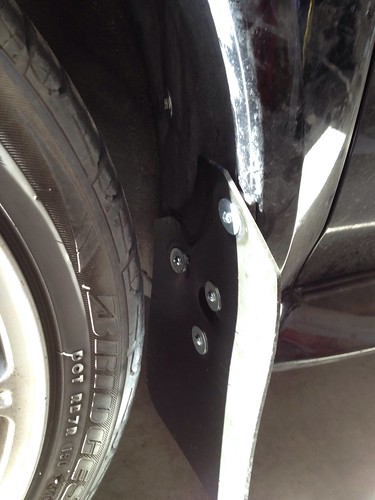
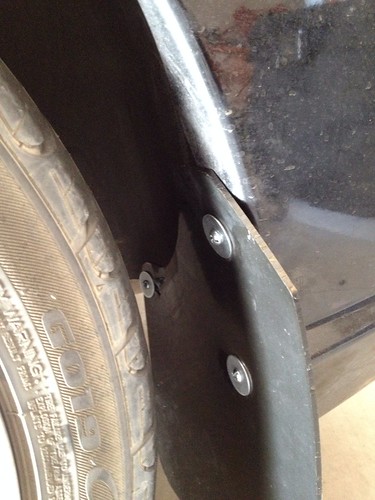
Not too much progress this weekend, since I was feeling a little under-the-weather and lazy. So all I did today was install my mudflaps and do a little project I’d been thinking of for a while. Here’s the first project and the mudflaps, I replaced all the push pins in the front fender liners with rivnuts and some machine screws; this is also the same method I used to install the mudflaps:
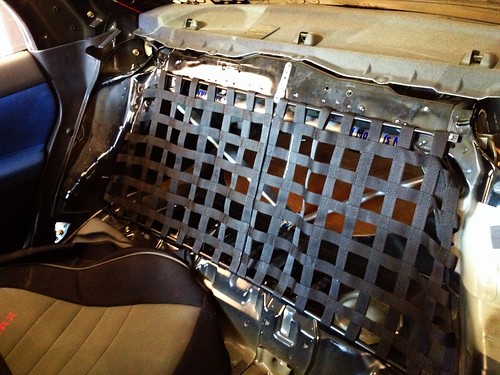
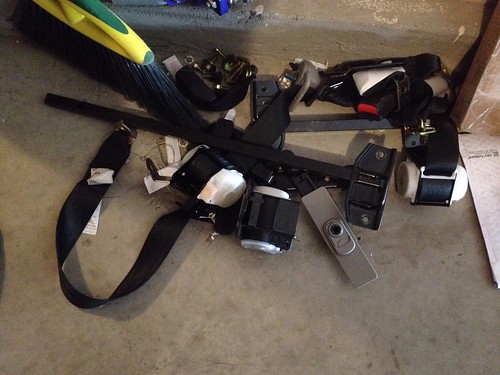
The second project was to install some window nets (the type used to keep you in the car when racing) and replaced the panel that was behind the car seats. While I was at it I removed the seat belts and some of the other un-needed hardware back there; probably 10-15 net pounds dropped off.
Maybe during this week (supposed to be half-days at work) I’ll cut the roof and install the roof-vent and scoop and maybe finally decide whether I’m installing the last 2 Stiffis or just removing the center one and leaving it with 2; spacing looks off no matter which way I go.
Last edited by gregroot198521 on Sat Apr 19, 2014 4:18 pm; edited 1 time in total
gregroot198521- Ol' Dirty Bastard
- Posts : 98
Reputation : 2
Join date : 2012-03-20
Age : 38
Location : North El Paso/ Main Fort Bliss
![]()
![]()
Re: Bianca ('06 STi) A New Start
![]() by Chaz2.5 Sun Apr 13, 2014 9:47 pm
by Chaz2.5 Sun Apr 13, 2014 9:47 pm
Very cool man. Welcome back! Question, what did you do with the backseat plastic panel that you removed. Wondering if I could pick it up from you if you have no need for it. Let me know if you need any help with anything, I'd be down to lend a hand. Too bad Chris still wasn't here so he could sit in the garage and drink beer and watch everyone do all the work. LOL!

Chaz2.5- Captain Slow
- Posts : 1237
Reputation : 101
Join date : 2012-04-03
Age : 43
Location : El Paso TX / Klamath Falls OR
![]()
![]()
Re: Bianca ('06 STi) A New Start
![]() by gregroot198521 Tue Apr 15, 2014 7:01 pm
by gregroot198521 Tue Apr 15, 2014 7:01 pm
Yessir, still have it. I'd love assistance on swapping in my Killer B oil pan one of these next weekends (I'm on leave, but I assume you work during the week), hear it's a lot easier with extra hands for assistance. Wanted to do the engine mounts at the same time since I have the upgrades waiting, wish I had the matching tranny mount too.Chaz2.5 wrote:Very cool man. Welcome back! Question, what did you do with the backseat plastic panel that you removed. Wondering if I could pick it up from you if you have no need for it. Let me know if you need any help with anything, I'd be down to lend a hand. Too bad Chris still wasn't here so he could sit in the garage and drink beer and watch everyone do all the work. LOL!
Yeah, wish Chris was still around too, miss that bastard. He would've just sat there drinking and poking fun at us working.
gregroot198521- Ol' Dirty Bastard
- Posts : 98
Reputation : 2
Join date : 2012-03-20
Age : 38
Location : North El Paso/ Main Fort Bliss
![]()
![]()
Re: Bianca ('06 STi) A New Start
![]() by cs10wrx Thu Apr 17, 2014 8:49 am
by cs10wrx Thu Apr 17, 2014 8:49 am
I call still drink beer and talk S*** over skype lol. On a serious note, I've quit drinking and smoking since I started college again.
Car is looking pretty good Greg.
Car is looking pretty good Greg.
cs10wrx- AWD Noobie
- Posts : 11
Reputation : 3
Join date : 2012-03-21
Age : 38
Location : Horizon City
![]()
![]()
Re: Bianca ('06 STi) A New Start
![]() by gregroot198521 Fri Apr 25, 2014 12:26 am
by gregroot198521 Fri Apr 25, 2014 12:26 am
That's weird, usually drink more and pick up smoking at college.......cs10wrx wrote:I call still drink beer and talk S*** over skype lol. On a serious note, I've quit drinking and smoking since I started college again.
Car is looking pretty good Greg.
Alright, some more progress. Tuesday (22nd) I started doing some things that I’d been waiting to do since they all involved pulling out the TMIC, and as anyone with a stock location IC on an STi knows, that thing is kind of a bitch to get back in quickly. (I’ll have to pull it back off to install the T-bolt clamps and the rest of the Samco hoses for the IC.)
So I started Tuesday by finally fixing my Defi gauge setup; the gauges weren’t lighting up unless the headlights were actually on (not just DRLs); turns out I just had the daisy chain of gauges in the spot for the plain, old Link-Meter gauges (spot 1) when they needed to be plugged into the jack for Link-Meter BF gauges (spot 2). As soon as I switched the connection and turned on the “Accessory” position with the key, they lit up. I followed this up by installing the white BF oil pressure gauge I found on Amazon (last one!!!) but had to wait for UPS to show up to install the sender as they were delivering the galley plug I needed to finish it up (made an extension for the sender using a grease gun hose, a couple 1/8 NPT female-1/8 BSPT fittings, one 1/8 BSPT female-female coupler, and the galley plug). Well I waited I took out the TMIC and started working my way to the galley plug location; all I can say is F*** whoever decided installing those spring clips upside down was a good idea, took me a good hour to remove the other end of the hose connected to the BPV (big hose, not little) and the other end of the coolant hose connected to the throttle body. Got a bit of a coolant shower as I worked around here, mainly because I used canned air to try and push the coolant out of that TB coolant hose and it pushed back out with extra pressure when I stopped pushing air in. Got to a stopping point in this job (galley plug hadn’t arrived yet) so I switched lanes.
Next job I switched to was installing the KartBoy Pitch Stop Mount, easy install, however I didn’t realize the nut on the firewall side was welded in place so I ended up breaking it loose. No biggy, just need a 17 and a 14mm (IIRC) to do it if I ever have to disconnect it. Next task was installing the Turn-In-Concepts Master Cylinder Brace, relatively easy install on a car without an air-pump (stock that way) and with the TMIC out of the way. Took me all of about 20 minutes to do taking my time, could feel the difference in the pedal feel (not sure if I felt the pitch stop mount however, I was paying attention to the last thing installed more) when I finally drove her. Time for another part since I was still waiting, think I’ll finally install the turbo blanket (PTP Lava) and my Perrin Turbo Heat Shield. Somewhat of a pain getting the old heatshield off, mainly the bottom portion as it is designed to be removed only if the downpipe isn’t in the way. A little bit of bending later and some pushing and it is out of the way. Turbo blanket goes in with some headache (imagine it is easier if the car is even more disassembled) and the heat shield goes over it with little hassle (snapped the head off one of the 2 bolts on the driver’s side, no biggy).
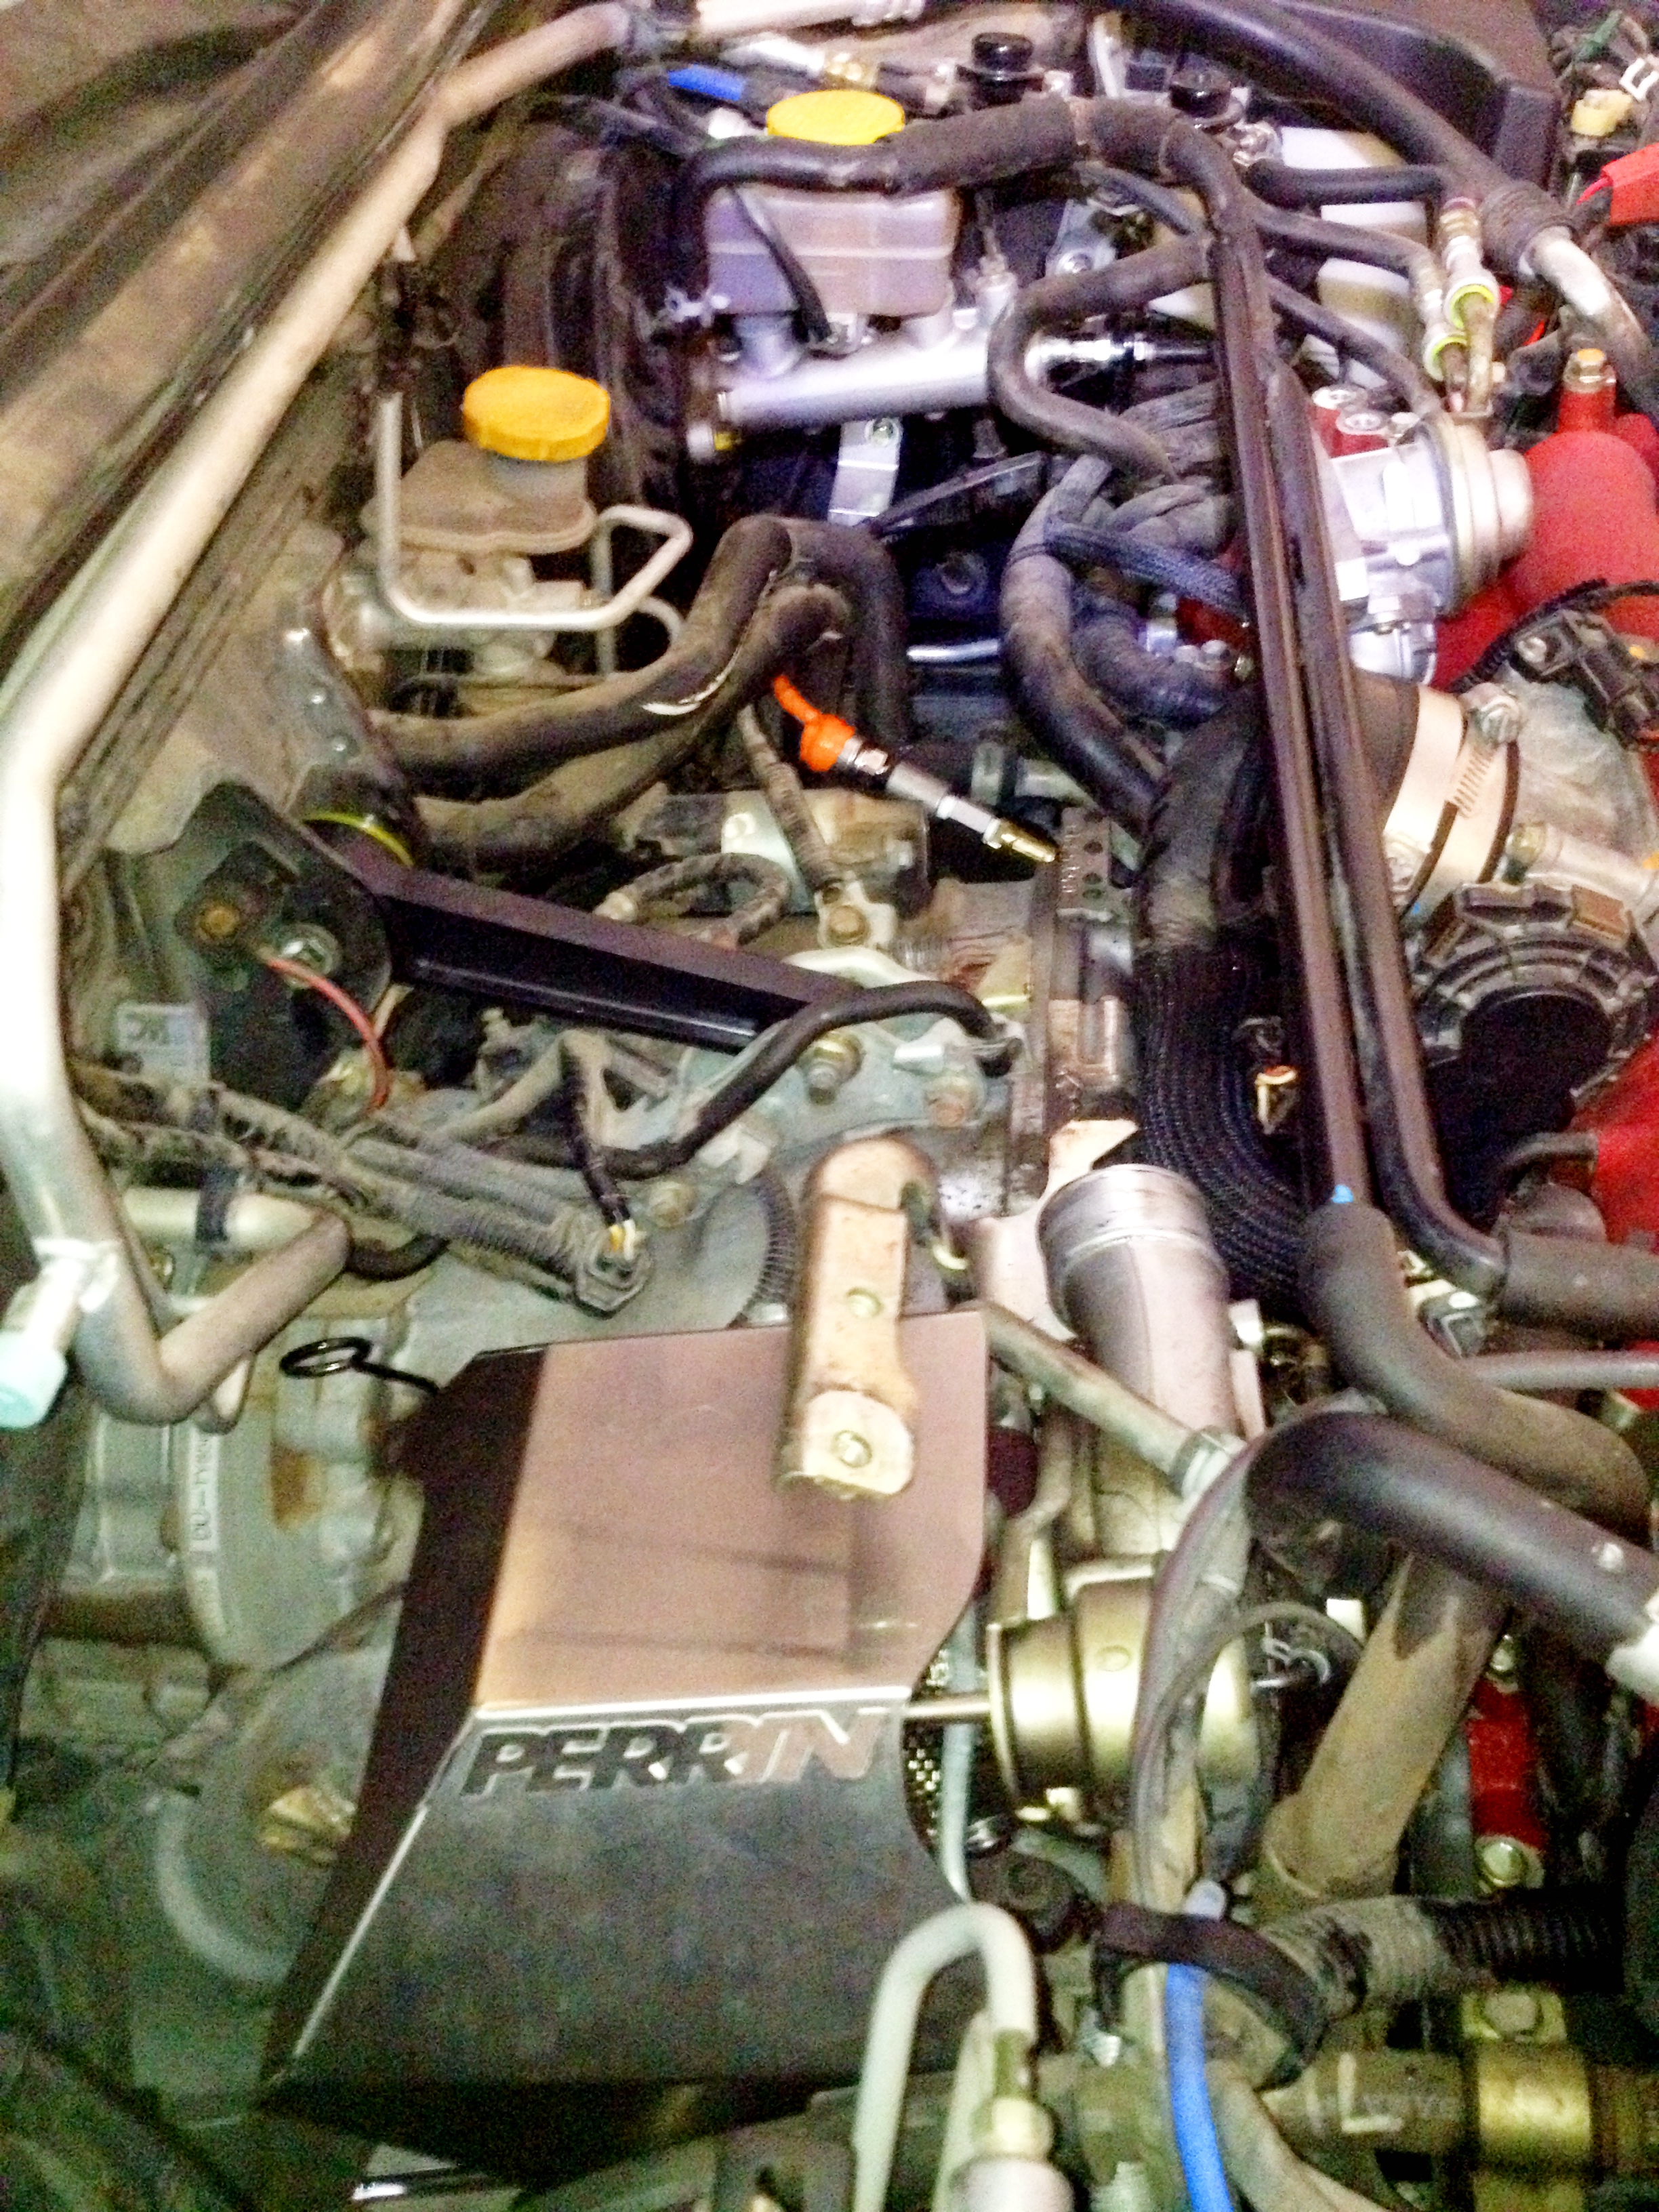
Finally the galley plug has arrived!! Time to install the oil pressure sender. Relatively easy install (once you get the old plug out after dealing with those damned spring clips and coolant showers), hook it up to the cable, run it in to the car and connect to the control unit. Good to go. It’s getting late so I do one last thing and finish the install on my boost gauge (had sender set up, just never got it hooked into the BPV hose). And with this last part done it is bedtime. Here are pics of the progress, you can see the blanket, heat shield, oil pressure sender and the MCB (partially) in the first pic; second shows the MCB a bit better.

Wednesday (the 23rd) I wake up and decide it is time to finally install something long awaited, right after I get that damned TMIC back in, along with all the hoses underneath. Ended up installing the Samco hose for the connection from the Y-pipe to the turbo as it was easier to install the IC with the hose on the turbo, almost popped right in to place after an hour of struggling with other strategies (also removed the driver’s side bracket to make life easier, reinstalled once IC was in place). Hooked everything up and made sure the coolant was fine by running it to clear any air in the lines. Seemed to be good to go, so onto the next job, the roof vent.
So finally got this job started, unfortunately the compressor I bought from Harbor freight was unable to do this task adequately so it had to be returned as it would allow me about 15 seconds of grinding before it spent a minute refilling the tank. Ended up cutting the hole with an angle grinder with a cutoff wheel and no guard (not safe, and got hit with lots of sparks). Finally got the hole cut out the holes for mounting drilled but because the wife was at school I had to wait for her to come home to actually get the vent mounted. The sealant I used (outdoor rated, paintable silicone caulk) takes a while to cure so I let it cure overnight with some modification to the external seal.
Woke up this morning and cleaned up the garage a bit after I gave the heads of the rivets a quick coat of black paint. Allowed it to dry a bit and then removed the masking I had down. Cleaned up and then installed the roof scoop.
Took her for a drive afterwards, had to go return the compressor and some other bits to Harbor Freight, shipped off a return to a shop and got fuel for myself and for Bianca, and mainly just to go for a drive. I could feel the difference that the MCB gave to the brakes, they feel less spongy now. Didn’t really notice the pitch stop upgrade, but I kind of forgot about it when I was enjoying the fruits of the rest of my labor, pretty gauges that are actually doing their jobs (except the EGT gauge, I need to finally get that sender installed in the headers) and the wind getting pushed in with the windows shut. I do need something to direct the airflow more to the sides to make the vent even more useful, but it does get the air moving in the car, when I was moving the car wasn’t ridiculously hot with the windows up, with the car at rest though it’s a different story (for obvious reasons). Here’s some pics post drive.

gregroot198521- Ol' Dirty Bastard
- Posts : 98
Reputation : 2
Join date : 2012-03-20
Age : 38
Location : North El Paso/ Main Fort Bliss
![]()
![]()
Re: Bianca ('06 STi) A New Start
![]() by Drpage420 Sun Apr 27, 2014 2:55 am
by Drpage420 Sun Apr 27, 2014 2:55 am
Your build is looking good Man. I just got here and it is nice to see I am not the only one with a build up of parts to be installed. If you ever want or need some help turning wrenches let me know. Have you tried using the Autocraft center on main post? I only ask because of the compressor issue you ran into. Anytime I am doing a lot of cutting I usually just use the Autocraft centers because their compressors hold more air, lol. Well I hope to see you around post.
Respectfully,
Steven H.
Respectfully,
Steven H.

Drpage420- AWD Noobie
- Posts : 18
Reputation : 2
Join date : 2013-12-13
Age : 41
Location : Kansas City, KS -
![]()
![]()
Re: Bianca ('06 STi) A New Start
![]() by gregroot198521 Mon Jun 09, 2014 9:20 pm
by gregroot198521 Mon Jun 09, 2014 9:20 pm
Drpage420 wrote:Your build is looking good Man. I just got here and it is nice to see I am not the only one with a build up of parts to be installed. If you ever want or need some help turning wrenches let me know. Have you tried using the Autocraft center on main post? I only ask because of the compressor issue you ran into. Anytime I am doing a lot of cutting I usually just use the Autocraft centers because their compressors hold more air, lol. Well I hope to see you around post.
Respectfully,
Steven H.
Thanks, Steven. I may have to take you up on that offer, got a few things left I need to install, some of which are said to be easier with another set of hands. I may have to check out the prices for the autoshop again, but I'll have to retake the class again since my card is probably 2 years expired now. I'll have to watch for you on base I suppose, not too many GCs from what I've seen (you and Chaz are the only ones I know of), which side are you on (biggs or Main post)?
One of these days I'll get my roof liner finished (sewing takes fooooorrrrreeeeevvvvveeeerrrrr when the contact adhesive stops working, and all those little stitches I'm putting in are ridiculously time consuming with out a machine), guess I should hunt down a local shop that has an industrial sized machine and have them do the diamond stitch on it.
gregroot198521- Ol' Dirty Bastard
- Posts : 98
Reputation : 2
Join date : 2012-03-20
Age : 38
Location : North El Paso/ Main Fort Bliss
![]()
![]()
Re: Bianca ('06 STi) A New Start
![]() by Drpage420 Mon Aug 04, 2014 4:17 am
by Drpage420 Mon Aug 04, 2014 4:17 am
I am on main post, near the Cassidy gate. Sorry for the delayed response. Just started installing more parts this weekend. I am going to throw an AEM UEGO on the car this week so I can start tuning.
Drpage420- AWD Noobie
- Posts : 18
Reputation : 2
Join date : 2013-12-13
Age : 41
Location : Kansas City, KS -
![]()
![]()
Re: Bianca ('06 STi) A New Start
![]() by WANTED Mon Aug 04, 2014 4:55 am
by WANTED Mon Aug 04, 2014 4:55 am
gregroot198521 wrote: I may have to check out the prices for the autoshop again, but I'll have to retake the class again since my card is probably 2 years expired now.
Wait a tic. Since when did they start putting expiration dates on them? Mine is good so long as I'm in the Army.

WANTED- Forum Outlaw
- Posts : 1479
Reputation : 14
Join date : 2012-04-12
Age : 109
Location : Savannah, GA
![]()
![]()
Re: Bianca ('06 STi) A New Start
![]() by gregroot198521 Thu Aug 07, 2014 10:50 pm
by gregroot198521 Thu Aug 07, 2014 10:50 pm
Ah, okay, yeah I'm on main post too, but I'm over by the air assault tower and Robert E. Lee gate (I refuse to call it "Buffalo Soldier" because F***-you too the whiney assholes it "offended").Drpage420 wrote:I am on main post, near the Cassidy gate. Sorry for the delayed response. Just started installing more parts this weekend. I am going to throw an AEM UEGO on the car this week so I can start tuning.
Good stuff, been out to any of the meets? Thought I saw a second GC out there at the C&C on Saturday (besides Chaz's beast).
Don't think they ever have put expiration dates on them actually, just something I was told (the 2 years limit), no biggy though, I now have a fresh card even though I never used the shop.WANTED wrote:Wait a tic. Since when did they start putting expiration dates on them? Mine is good so long as I'm in the Army.gregroot198521 wrote: I may have to check out the prices for the autoshop again, but I'll have to retake the class again since my card is probably 2 years expired now.
Some day I'll write up the next update (when I'm not almost constantly busy with work) since I did end up installing the oil pan (etc...), engine mounts, Samco hoses and finished another gauge run.
gregroot198521- Ol' Dirty Bastard
- Posts : 98
Reputation : 2
Join date : 2012-03-20
Age : 38
Location : North El Paso/ Main Fort Bliss
![]()
![]()
Re: Bianca ('06 STi) A New Start
![]() by gregroot198521 Sun Sep 28, 2014 11:43 pm
by gregroot198521 Sun Sep 28, 2014 11:43 pm
I'm slowly getting an update together here, got some stuff going in slowly (and a bunch of work that I finished), but I'd rather wait to make a bigger post (seems more worthwhile). This will be more of a life update post.
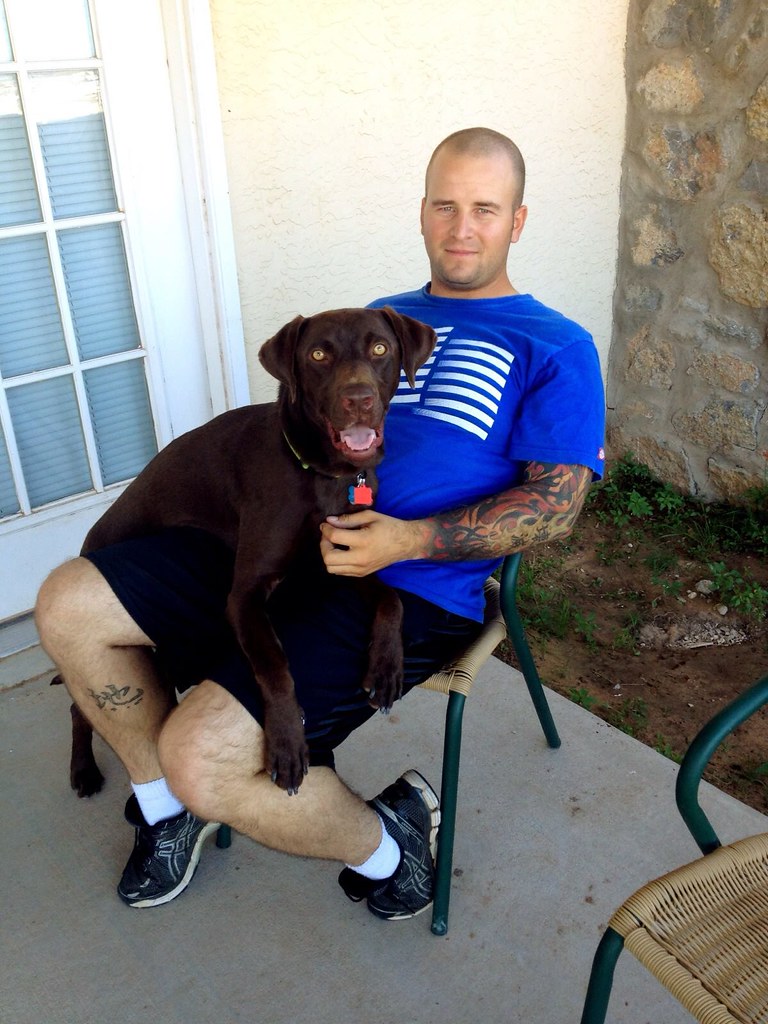
Here's our dog, Cassie. She's a Weimaraner/Chocolate Lab mix (about 1.5 years old) that the wife and I rescued from the animal services shelter here the middle of July. She had been dropped off there by her previous family that claimed they couldn't take a Lab with to their next duty station (haven't heard of a single duty station that restricts Labs, so calling bull**** there, they couldn't deal with her energy is more likely).
Unfortunately she had developed kennel cough while in the shelter, when we went to get that treated we found out she also had heart-worm and based on the development she had had it (them?) a while, so before her previous family dumped her, a good while. My conjecture is that they found out about the heart-worm and cheaped out on treating her (much less vaccinating her) or putting her down and instead paid the small fee to drop her off at the shelter. (Plea for help is near the bottom, along with a link to the gofundme page for Cassie's treatment).
After some tests (to see how enlarged her heart and other organs were) we decided we would get her treated. This consists of 3 months of treatment, first month is HeartGuard to kill the eggs, second month is a shot to kill the adults (happened two Fridays ago) and the third step will be two more shots a month later seperated by 24 hours. We will have to keep her as inactive as possible during this time (the months after the shots) which is quite difficult with an energetic breed mix and one this young. The purpose of the inactivity (and keeping her heart-rate lower) is to prevent strokes or the lungs from getting clogged from dead worms.
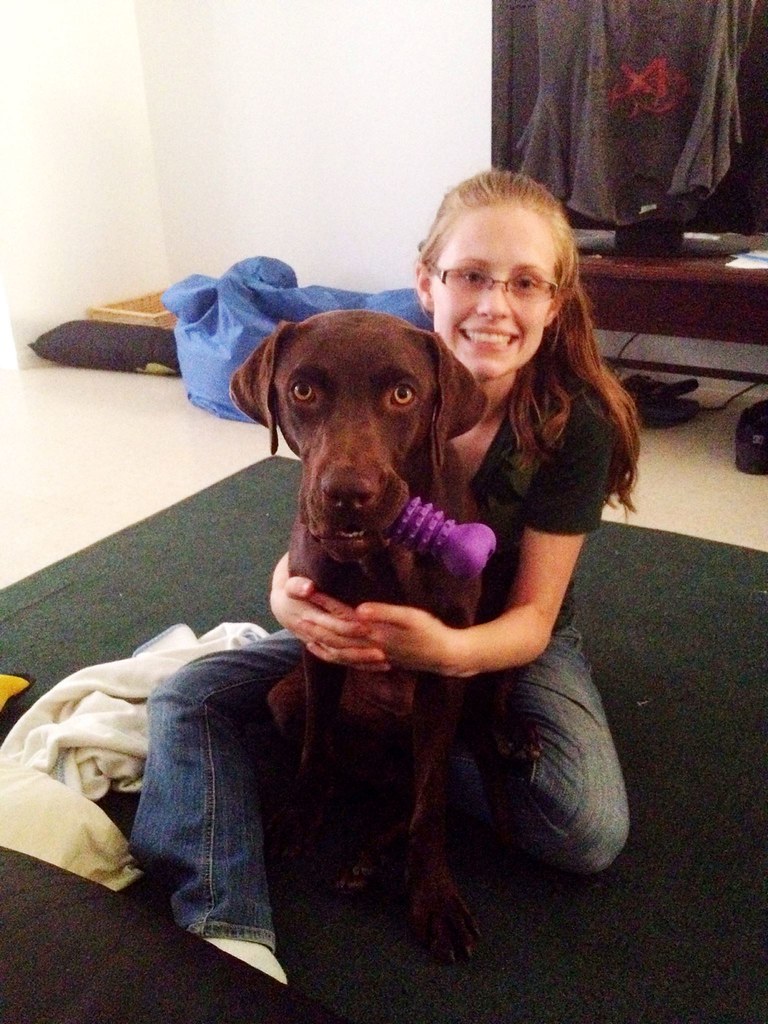
Anyways, here's a couple pictures of this goofball (she thinks she's a lapdog, she's 60 lbs). She loves to run and jump around a lot so that makes this period even more difficult, but chew toys are helping.
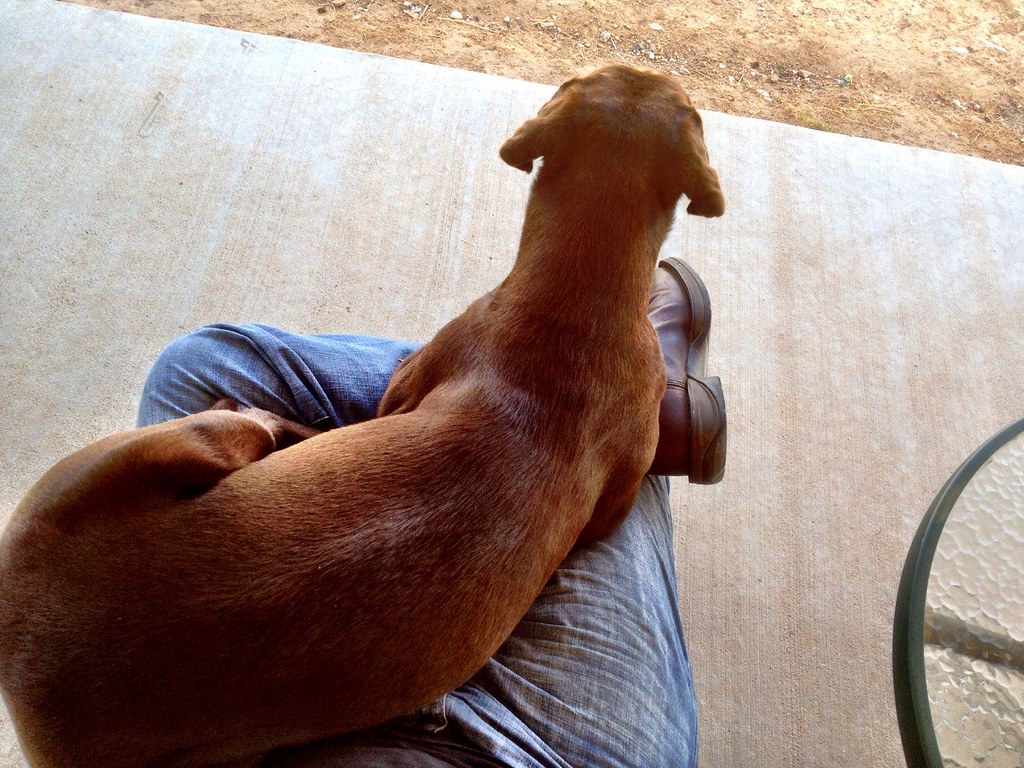
Her being my wife's lapdog (she seriously just plops down in your lap):
And one of her and that giant, floppy tongue:
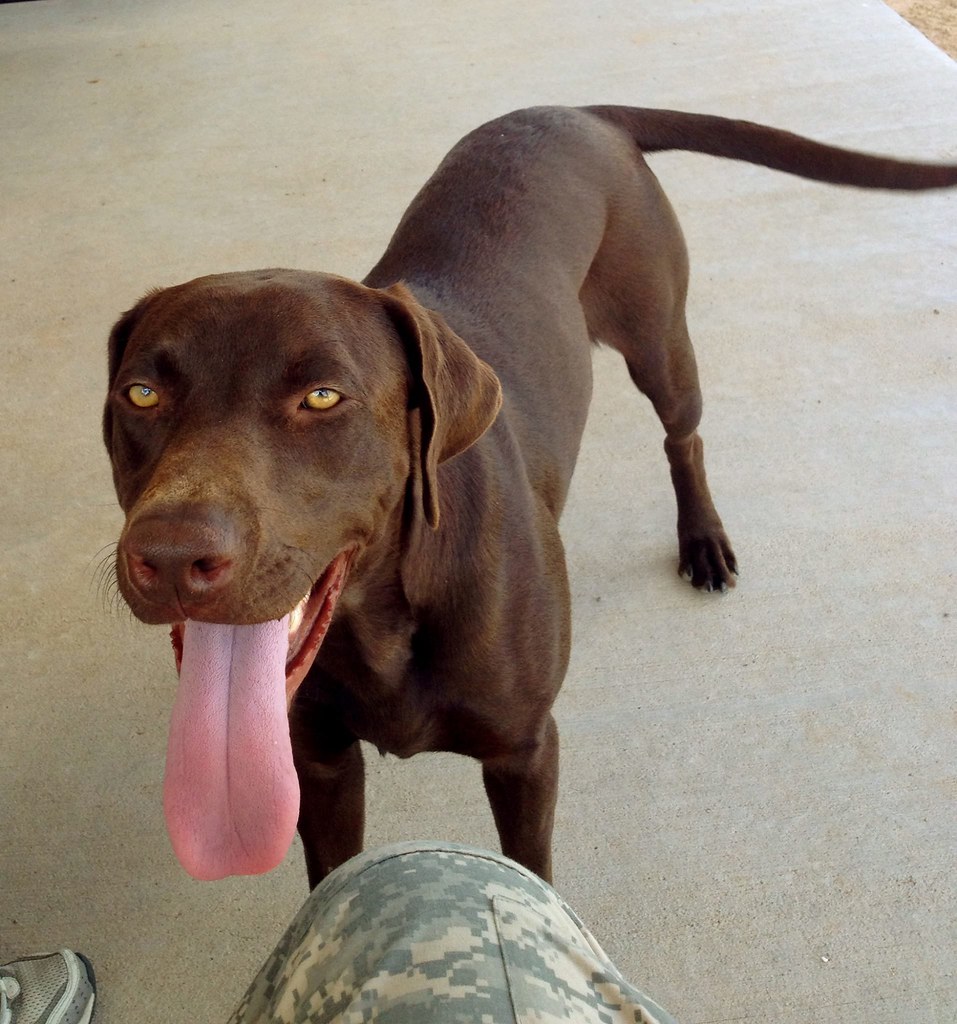
We started a gofundme page for her treatment too (it's going to cost us around a grand to hopefully save her life and hopefully get a full life out of her). Here's the link: [URL='http://www.gofundme.com/bs2jv4']Cassie May Heartworm Treatment[/URL] if anyone wants to contribute at all. I'll also quote what my wife said in it, since she's a bit more eloquent in this case than I am.
Anyways, sorry about the wall of text, but that's our pup that we love. Cheers.
-Greg
Here's our dog, Cassie. She's a Weimaraner/Chocolate Lab mix (about 1.5 years old) that the wife and I rescued from the animal services shelter here the middle of July. She had been dropped off there by her previous family that claimed they couldn't take a Lab with to their next duty station (haven't heard of a single duty station that restricts Labs, so calling bull**** there, they couldn't deal with her energy is more likely).
Unfortunately she had developed kennel cough while in the shelter, when we went to get that treated we found out she also had heart-worm and based on the development she had had it (them?) a while, so before her previous family dumped her, a good while. My conjecture is that they found out about the heart-worm and cheaped out on treating her (much less vaccinating her) or putting her down and instead paid the small fee to drop her off at the shelter. (Plea for help is near the bottom, along with a link to the gofundme page for Cassie's treatment).
After some tests (to see how enlarged her heart and other organs were) we decided we would get her treated. This consists of 3 months of treatment, first month is HeartGuard to kill the eggs, second month is a shot to kill the adults (happened two Fridays ago) and the third step will be two more shots a month later seperated by 24 hours. We will have to keep her as inactive as possible during this time (the months after the shots) which is quite difficult with an energetic breed mix and one this young. The purpose of the inactivity (and keeping her heart-rate lower) is to prevent strokes or the lungs from getting clogged from dead worms.
Anyways, here's a couple pictures of this goofball (she thinks she's a lapdog, she's 60 lbs). She loves to run and jump around a lot so that makes this period even more difficult, but chew toys are helping.
Her being my wife's lapdog (she seriously just plops down in your lap):
And one of her and that giant, floppy tongue:
We started a gofundme page for her treatment too (it's going to cost us around a grand to hopefully save her life and hopefully get a full life out of her). Here's the link: [URL='http://www.gofundme.com/bs2jv4']Cassie May Heartworm Treatment[/URL] if anyone wants to contribute at all. I'll also quote what my wife said in it, since she's a bit more eloquent in this case than I am.
And the update about a week ago:I would like to introduce you to Cassie May! She is a gorgeous, affectionate, and goofy 1.5 year old lab mix my husband and I adopted from the local kill shelter. Her favorite thing in the world is to cuddle up in our lap, despite being 60 pounds, and give us tons of kisses! She likes to carry her toys and blanket in her mouth wherever she goes. She can usually be found right behind us as she doesn't let us out of her sight, not even for a minute! It makes for some interesting showers.Despite her background, she is a loving and happy dog and fits perfectly within our family. However, a couple days after adoption, we discovered she tested positive for heartworm. We were devastated as we had already fallen in love with her and her with us. She is our little shadow. <3 We decided we wanted to go ahead with the treatment and give her the best possible life because she deserves it. Unfortunately, we were not expecting a $1000 vet bill and a 4.5 month long treatment. My family and I are asking you from the bottom of our hearts if you could please help with her treatment. Any amount of money would be greatly appreciated and will help us immensely. We want our baby girl to be healthly and live a long wonderful life. Thank you. <3
Hi everyone! I wanted to say thank you again to everyone that has donated and shared Cassie's page. It means a great deal to myself and my family. I also wanted to update everyone on how Cassie has been doing. She has been enjoying life these past two months. Her favorite things in the world are to try and catch bugs in our backyard and then cuddle up in our lap once she is tired. However, the fun and play times have come to end. Cassie started the next part of her treatment yesterday. She received an injection in her back that will kill the worms. The side effects of the injection are an increased chance of stroke, heart attack, and lung blockages if her heart rate increases too much and the dead worms break off and enter her lungs. This means the baby girl is not allowed to play, take walks, or get super excited for two months. If you know this girl, you know that is going to be a challenge. She is full of so much spunk! Unfortunately, that means she will have to be crated for the majority of the time as per the veterinarians directions. She also will receive another two injections 24 hours apart in another month. Then a month later, hopefully all the worms are dead and the baby girl is in the clear! It is going to be a difficult and anxiety filled journey. I ask that you can keep Cassie and our family in your prayers. Thank you.
Anyways, sorry about the wall of text, but that's our pup that we love. Cheers.
-Greg
gregroot198521- Ol' Dirty Bastard
- Posts : 98
Reputation : 2
Join date : 2012-03-20
Age : 38
Location : North El Paso/ Main Fort Bliss
![]()
![]()
Re: Bianca ('06 STi) A New Start
![]() by gregroot198521 Wed Nov 12, 2014 10:02 pm
by gregroot198521 Wed Nov 12, 2014 10:02 pm
6SEP2014: So, it’s been about 5 months since I’ve done any real update, and there has been a bit of work done, but nothing much since the end of June due to always working and having not bought the remaining items for my lift (King springs and sending the struts to Feal for a revalve/rebuild). The biggest changes are the installation of the Killer-B oil pan/pick-up and baffle combo (with the Fumoto valve and the oil temperature sender installed), Tigwerks engine mounts, and the rest of the Samco TMIC hoses. Oil pan and engine mounts were both giant PITAs to install. Still need to decide on my choice of tranny mount upgrade to finish out the setup on that end. Didn’t remember to take any pics during this, and I’m trying to remember if I did any other additions or changes at this point beyond the oil change and swapping out the tranny/front & center differential fluid. Rear diff will get fresh fluid after my billet 6061 rear differential cover (for an R180) with 30% extra capacity arrives.
I changed the setup of the gauges a month or so ago with some permanently installed gauge pods, one on the bottom of the A-pillar (oil pressure) and one mounted up above the mirror (EGT, still just sitting there blinking until I get my headers swapped), the oil temp and boost gauges are still in the same places, mounted in the ATI steering-column pod. Changed up how my driving camera was mounted once again, used a few different parts from Ram mounts for the job; much more stable now and doesn’t restrict the movement of my rear-view mirror (at least not in a way that bothers me).
(INSERT PIC of camera and gauges)
The roof liner and everything else roof mounted (visors, oh-S*** handles and lights) are all out until I redo the roof liner since it started sagging really badly. I attempted to start sewing it up by hand but that was turning out to be WAY too tedious for me. I will eventually pull the covering off again and redo the contact adhesive correctly, then it will all go back in, though I will need to figure out a solution for the visors (maybe dyeing the cloth part and vinyl wrapping the mirror lids). Once that is all back in I’ll have to figure out a solution for the air-flow from the roof-vent, namely to direct it more to the sides than backwards. Another interior thing to get updated were my seat covers, got some almost WRB colored Neoprene covers from Wet Akole, took some picture sending for them to finish, but the results are pretty good. Still need to install the passenger seat’s cover however.
(INSERT PIC of roof liner when it’s eventually back in)
Speaking of the roof vent, we had a bit of a rainy season here and I developed a leak from the vent install. I ended up pulling the scoop and scraping out all the silicone caulking I had used. The stuff was essentially worthless for the job it seems, as it started breaking down from the heat. After cleaning it out and doing a bit of sanding, I wiped it all down with alcohol and refilled it with my favorite adhesive out there, E6000. I know this stuff works fine as it is what I used to seal al the rivets holding down the diffuser on the rear edge of the roof. Everything is back in and same as before, but unfortunately I think I will have to do a full pull of the roof vent itself and reinstall with the E6000 on all connecting surfaces as well as on top. This time I’ll try and get some more substantial help than my wife, maybe I’ll use bolts and nuts to hold the vent in place (and get it in tightly) while I install the rivets, just have to figure out a method of holding up the washers on the bottom (maybe tape will be the best bet).
On to today (6SEP2014); I’ve had some issues with the reverse lights being a little finicky at times, based on the symptoms I assumed it was the switch acting up, so I ordered one to put in. Just in time too, since the switch had completely stopped working. This is a huge PITA to change on a 6-speed if you don’t want to truly remove the tranny, which is how I did it; removed the tranny sub-frame and split the drive shaft (rather than allowing fluid to leak out of the hole the DS goes into; this is all the easy stuff though. Fun part was trying to replace the actual switch which required a crowfoot wrench I didn’t have, locating one was a PITA too, wasted 2 hours of the day running out to the Sears (looked like the single piece tools had been ransacked, and not a single crowfoot other than a $50 dollar package of ones I already had), ended up having to go farther out to Harbor Freight and bought a set there; 19mm crowfoot is now in my kit, along with some other spare metric crowfeet. After the time-drain I get all the necessary pieces removed and separated (sub-frame removed, tranny sitting on my second jack, driveshaft split, etc.).
Alright, finally get the bad switch out (easy enough to remove, one good twist with a double extension on the crowfoot and it spins out with one finger moving it) and decide I want to check both old and new electrically before the install. Set up my multimeter (to resistance) and check the old switch, open with nub out (correct), with nub in I’m getting mega-ohms of resistance (think I found the problem); new switch is open with nub out, and 1 Ohm with the nub in, new one is good. Now to try and get the new one installed (this is where I was hating life), took me almost 2 hours of struggling to get the bastard to start screwing in straight (very difficult to do when you can barely reach it with one arm over the tranny (literally could only touch it with my fingertips) and the other hand can only get to the knuckles between the tranny and tunnel). Finally get the switch in, and get it tight after some more finagling with the crowfoot and extensions; check out the reverse lights, they work beautifully again.
Since I was already in the area, I finally installed the Kartboy shifter bushings that had been sitting around forever and then installed the matching short throw shifter too. Feels a good bit more accurate now, no wonder though, the rear bushing was almost dry-rotted out (quite cracked on the surface, and very stretchy). Going to be fun to go drive around with this setup tomorrow.
Next was getting to the installing of the Borla exhaust that has been hanging around waiting. The modifications I have planned for it will happen at a later date (after I get a MIG welder for the garage), along with the other metal work projects I have in mind. And it’s in, pretty simple install, though it was a little beat up from the previous owner, and the slip fittings took a little massaging to get together right, but I heard no leaks like the P/O stated. It sounds pretty good when cold though.
(INSERT PIC of exhaust)
Next things on the agenda are starting to do some maintenance upgrades, which for now will consist of tire rotation, replacing the axle nuts (eventually, one thing at a time), fresh ball joints and swapping the struts for the lower mileage set in the closet. Also, I purchased another ’06 STi steering wheel for a project I’ve been thinking of doing, for now I’ll remain relatively tight lipped about it though I need to find a shop that welds Magnesium. Other than this I have some other parts arrived for the brake swap (fresh rebuild kit, a fresh color to paint the brakes in and some speed bleeders), a switched set of plugs for the diagnostic wires, a switched set of plugs for the clutch position switch (since the switch is being finicky lately and I will have an option of turning it back on and requiring the clutch to be pushed in) and I am in the process of changing out (read as deciding the colors) for some changes to the boots (e-brake and shifter) and center console (adding a matching cover) inside the car (working with Redline Goods on this).
1-9NOV2014: Alright, went to a cruise today, had some really bad luck though. Nailed a chunk of rebar and concrete that was hanging out on an exit. Destroyed both wheels on the driver’s side, and the front tire received a hole almost large enough to fist. I didn’t have the worst luck however, Bianca’s “twin” (another OBP ’06 STi but with gold BBS’ instead of silver like mine) blew their engine. Couple of the guys on the cruise convinced the owner to let me borrow 2 of his wheels (read as a temporary swap) to get me home. So now I more or less have forced my own hand at starting the 4/2 pot swap so I can run the old rally rims (and A/T tires) I had on Roxxy. So I started the swap on Tuesday night (4NOV, had to work on Sunday and Monday and it interrupted my planned starts), and as all installs seem to go, there are other irritating hiccups in the job.
These pics are both sides of the front wheel, notice the bend in the inside end is visible from the outer-side pic (about 60* clockwise):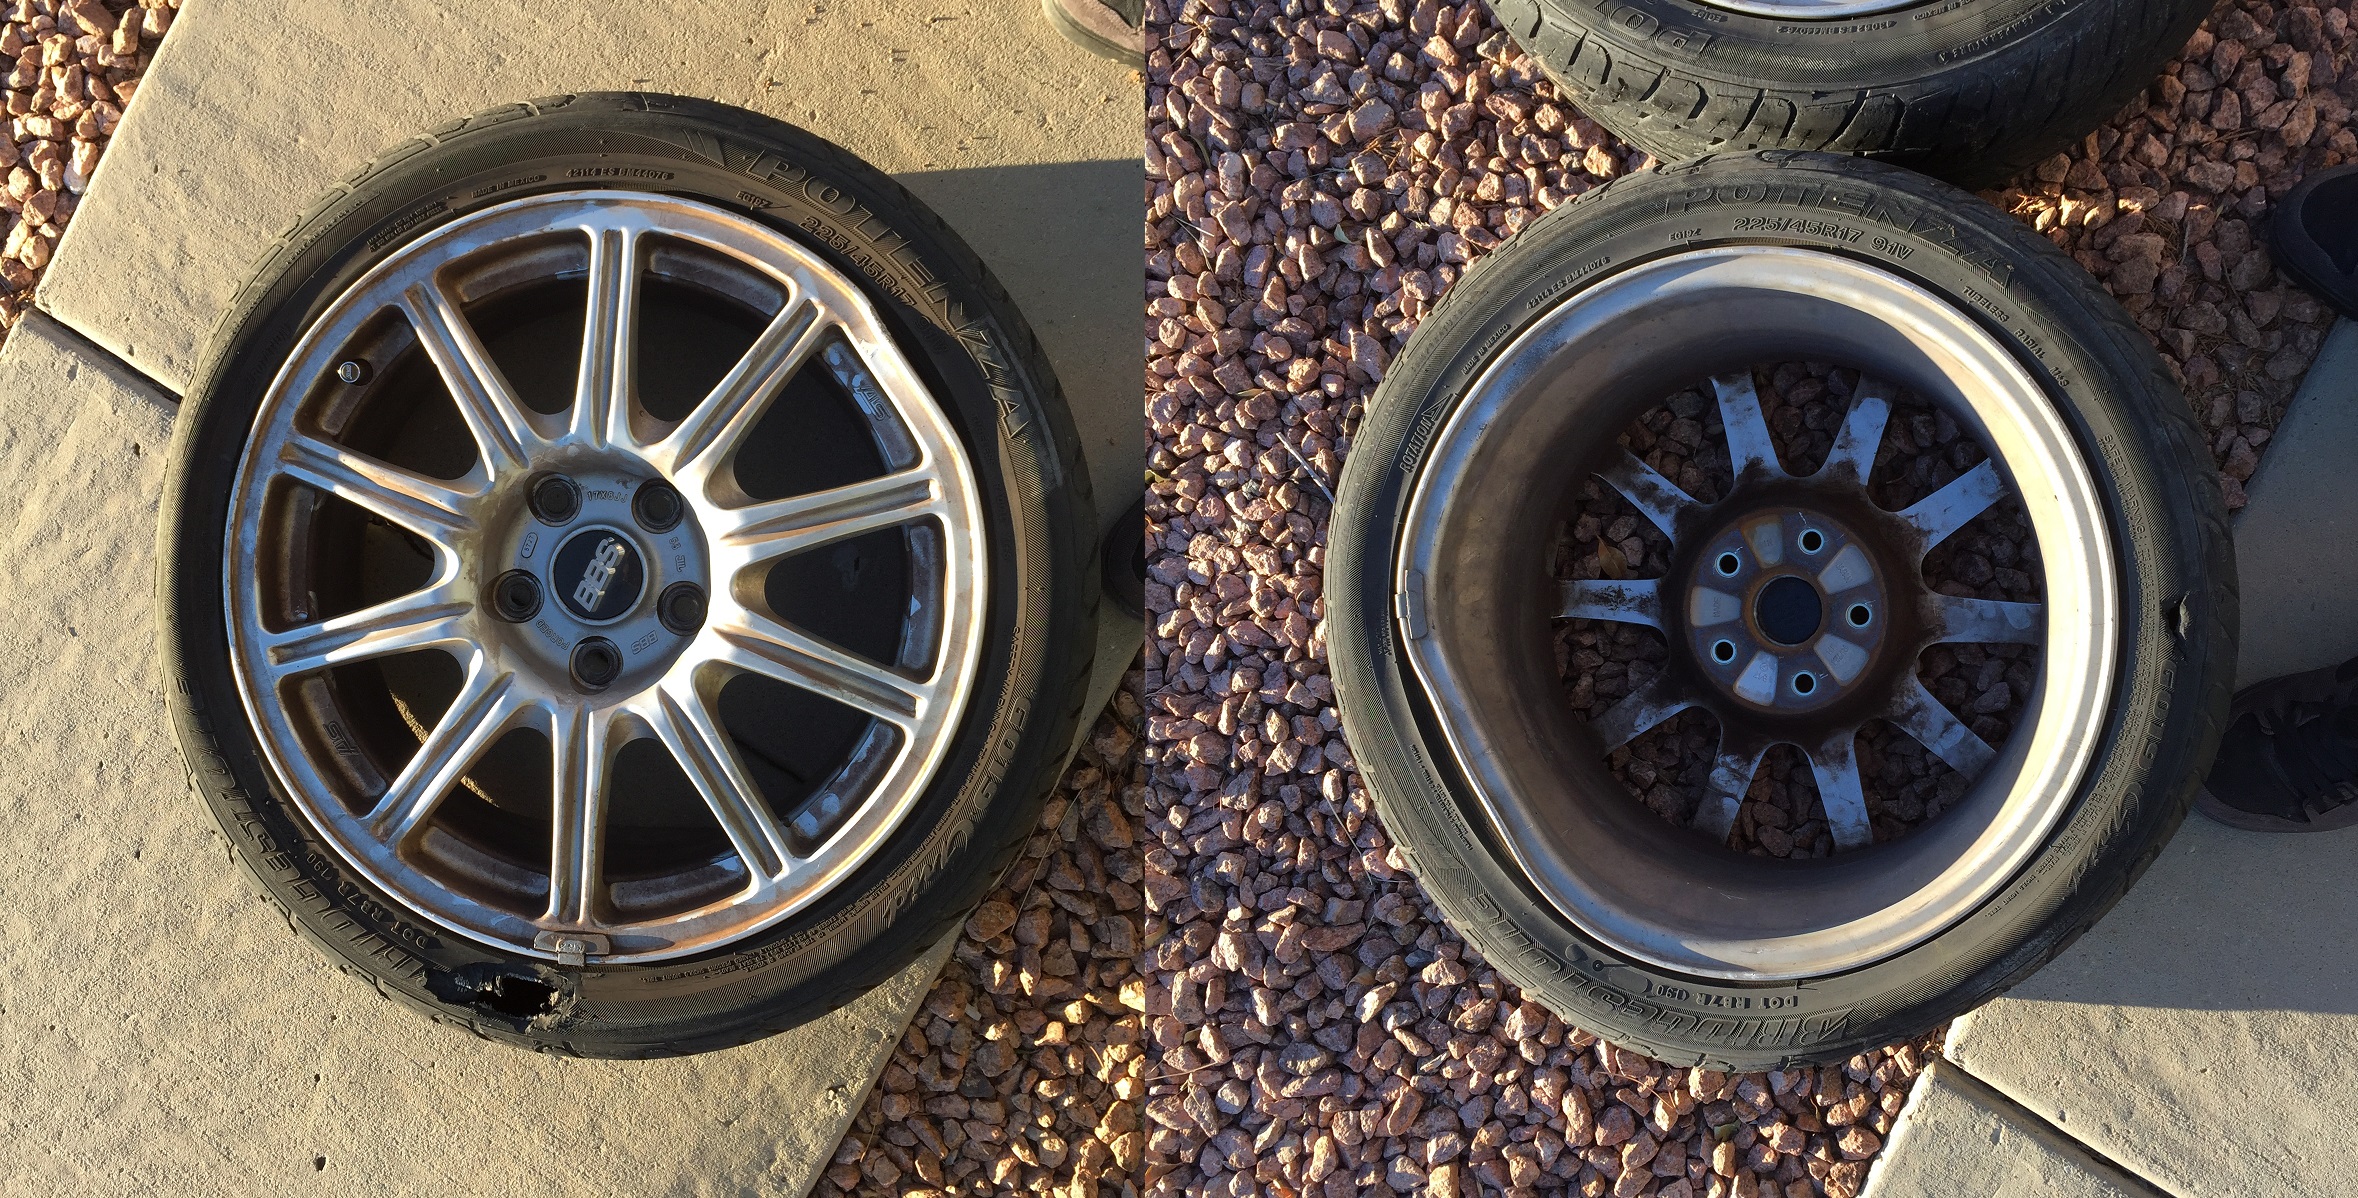 DS Wheel Front by RooT1985, on Flickr
And this is the rear wheel, outside section looked fine, inside not so much:
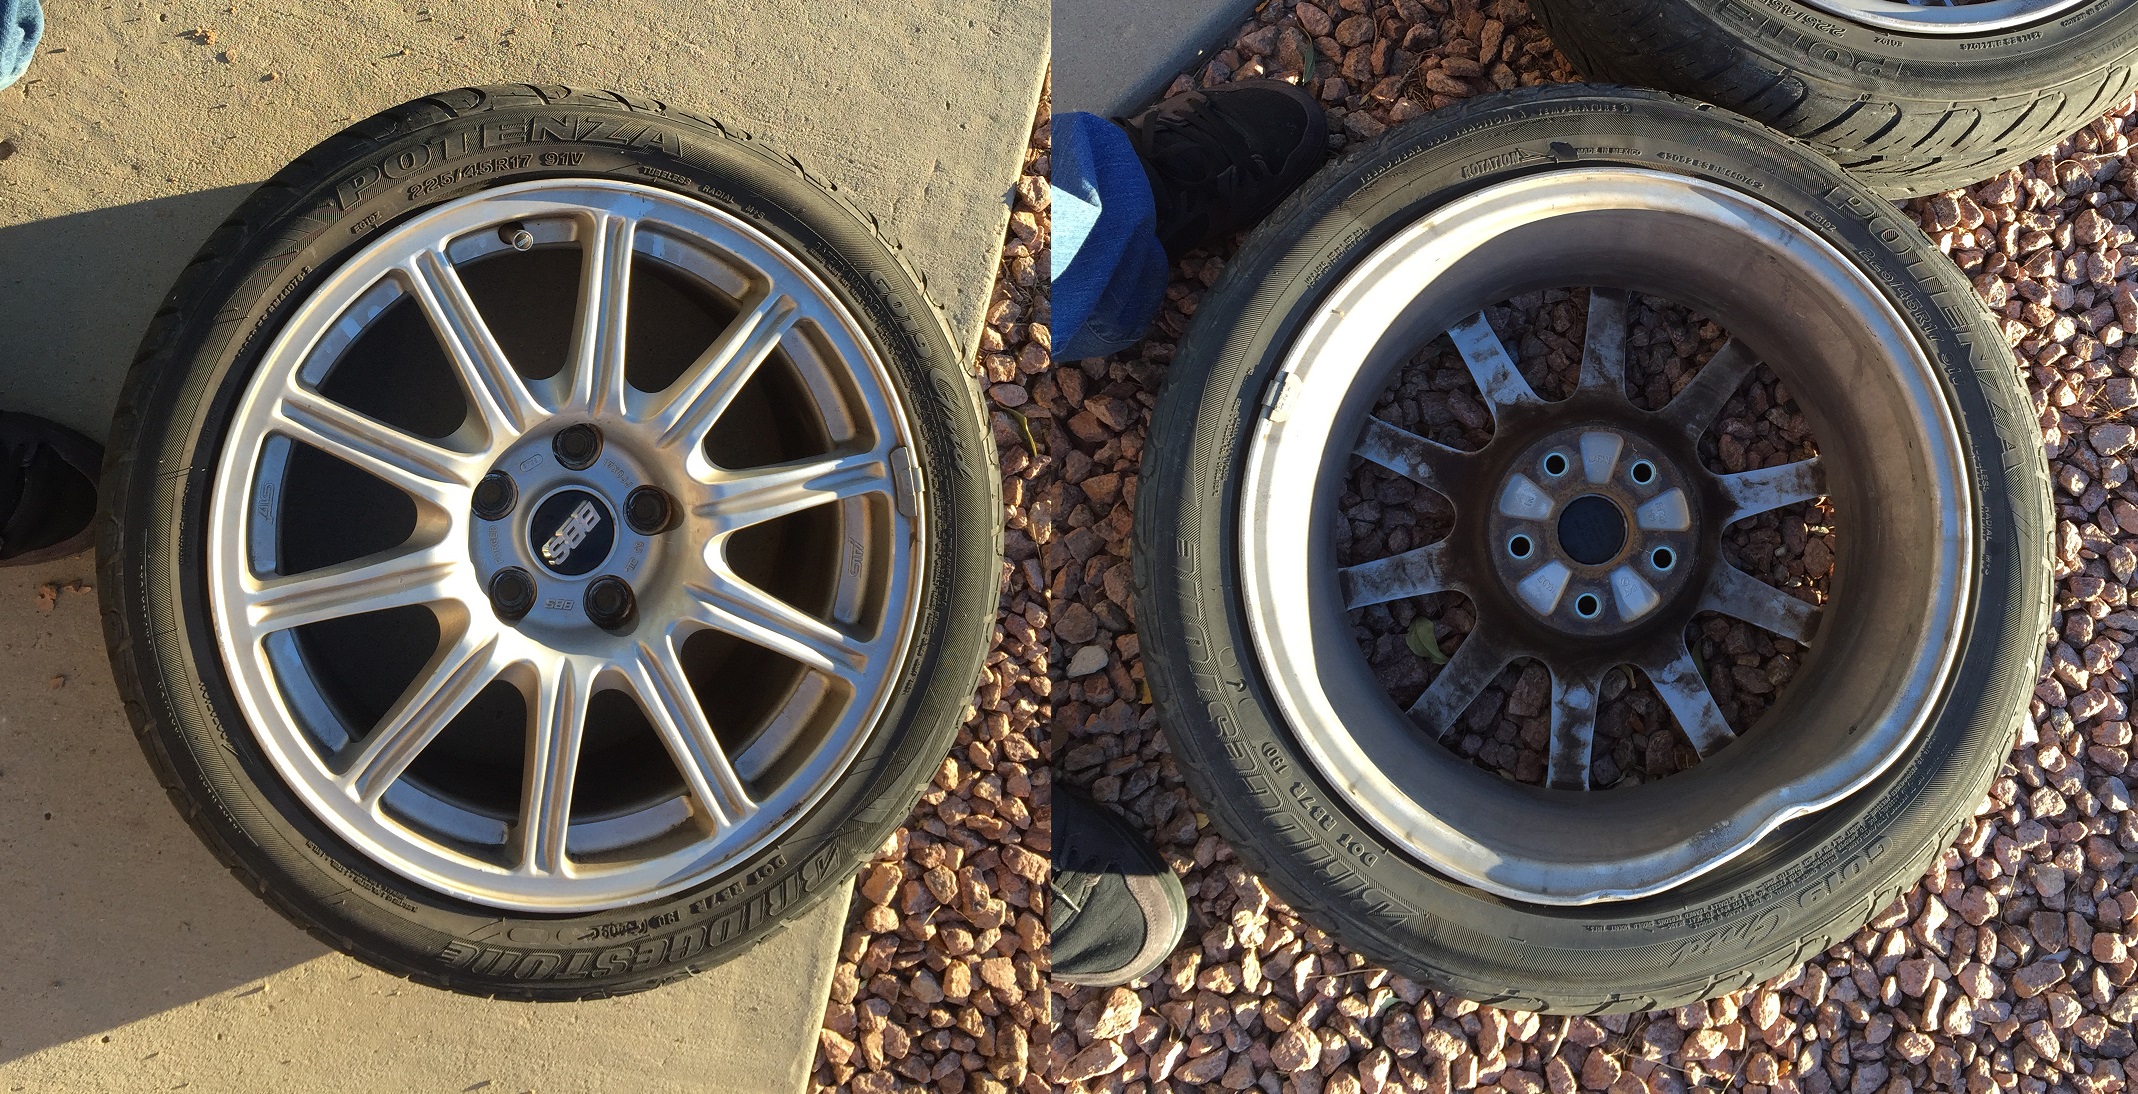 DS Wheel Rear by RooT1985, on Flickr
Luckily I had already rebuilt the 4/2 pots (including a second rebuild of the front DS caliper after I snapped the bleeder off inside and the removal bit too, FML) and had them mostly ready to go in (other than rears, didn’t have them put back together yet). So I get the fronts off on Tuesday night, and Wednesday night I get the new DBA rotors, Porterfield pads, rebuilt caliper and the Goodridge lines all in on the front, but apparently stripped (discovered on Sunday (9NOV) night after getting everything buttoned up) the mounting holes on the DS caliper (yes, this caliper is the main gremlin on this job), so it’s time to use that Time-Sert kit I had waiting around (unfortunately I need to get another tool to use the taps, as the one I have isn’t correctly sized).
Thursday I get a good bit of the job done, get the calipers rebuilt, get most of the install done, fresh lines and rotors are in, but need to get the correct mounting bolts for the calipers (Brembos are M10x1.5m I needed M10x1.25 for the 2 pots) and longer bolts for the Grp N top hats on the struts I was swapping in. Bought all those bolts during lunch time on Friday so I could get hot on continuing the install after work. Friday night is spent getting the rear calipers completed and installed and starting on the strut swap in the rear. Start the swap to fresher struts with Grp N top hats and ½” spacers on the rear that night, get the most of the way through both sides.
Saturday I do the install of the front struts with Grp N top hats and ½” spacers, lose one of the nuts for the top hat in the black hole called an engine bay, need a replacement now. Installed Eibach camber bolts on all 4 struts, change my mind and remove them again. After this I do the install of the TSS trailing arms and trailing-arm-mounts, adjusted out about ¼” longer than stock (have the option to adjust them from stock - ~2” longer), whenever I snag and install the lifting King springs I’ll adjust them out longer. Lost about 5 hours of work time that day due to my boss’ birthday party/lunch at Olive Garden and the food baby I had thanks to their endless pasta bowl (bad enough I considered inducing vomiting). Once I finally get back to work (after I installed the second trailing arm) I decided to try refilling the brakes by myself and discover the bleeding system I bought requires a compressor (I don’t have one, not going to get one soon either) so on to researching how to build my own one man bleeder.
Sunday I go and pick up the parts to build my own bleeder (1 gal pump sprayer, some hose, some fittings and a fresh cap for the MC reservoir), get it built and do some fine tuning to get it to work correctly (mainly to get the cap to have a tighter seal). I refill the lines and get the wheels back on the car, and attempt to move the car, and it’s not moving, one of the calipers is inhibiting movement. I lift the car again and start doing some inspections and discover one of the bolts is stripped on the driver side front caliper, start working on it but the stripping gets worse. All the parts stores are closed by this point so I close up shop for the night as I have to work early on Monday morning.
11NOV2014: Install is complete, rebled the brakes again and did some adjustments on the brakes (like putting an extra washer on the mounting bolts for the front calipers to stop the touching between the bolt and the rotor’s face). After getting this all done I was able to finally take the car for a spin, fill the tires back up (two were sitting at ~20 PSI, one at ~10 PSI (went in the trunk as a full size spare) and the other two were sitting right below 30 PSI), and bed the brakes a bit. Unfortunately I have the symptoms of a CV joint that is on it’s way out on the front passenger side (grinding/scraping noise only on a left turn and only on one side with no evidence of rubbing anywhere). After going for a little drive I came home (inspected the front passenger side wheel at this time, again) and installed the DAMD steering wheel I had hanging out. It all looks pretty good now, love the feel of the wheel a lot.
Here are some pics of the car at the end of all of this and the steering wheel (and surrounding area).
[URL="https://flic.kr/p/pKwoqD"]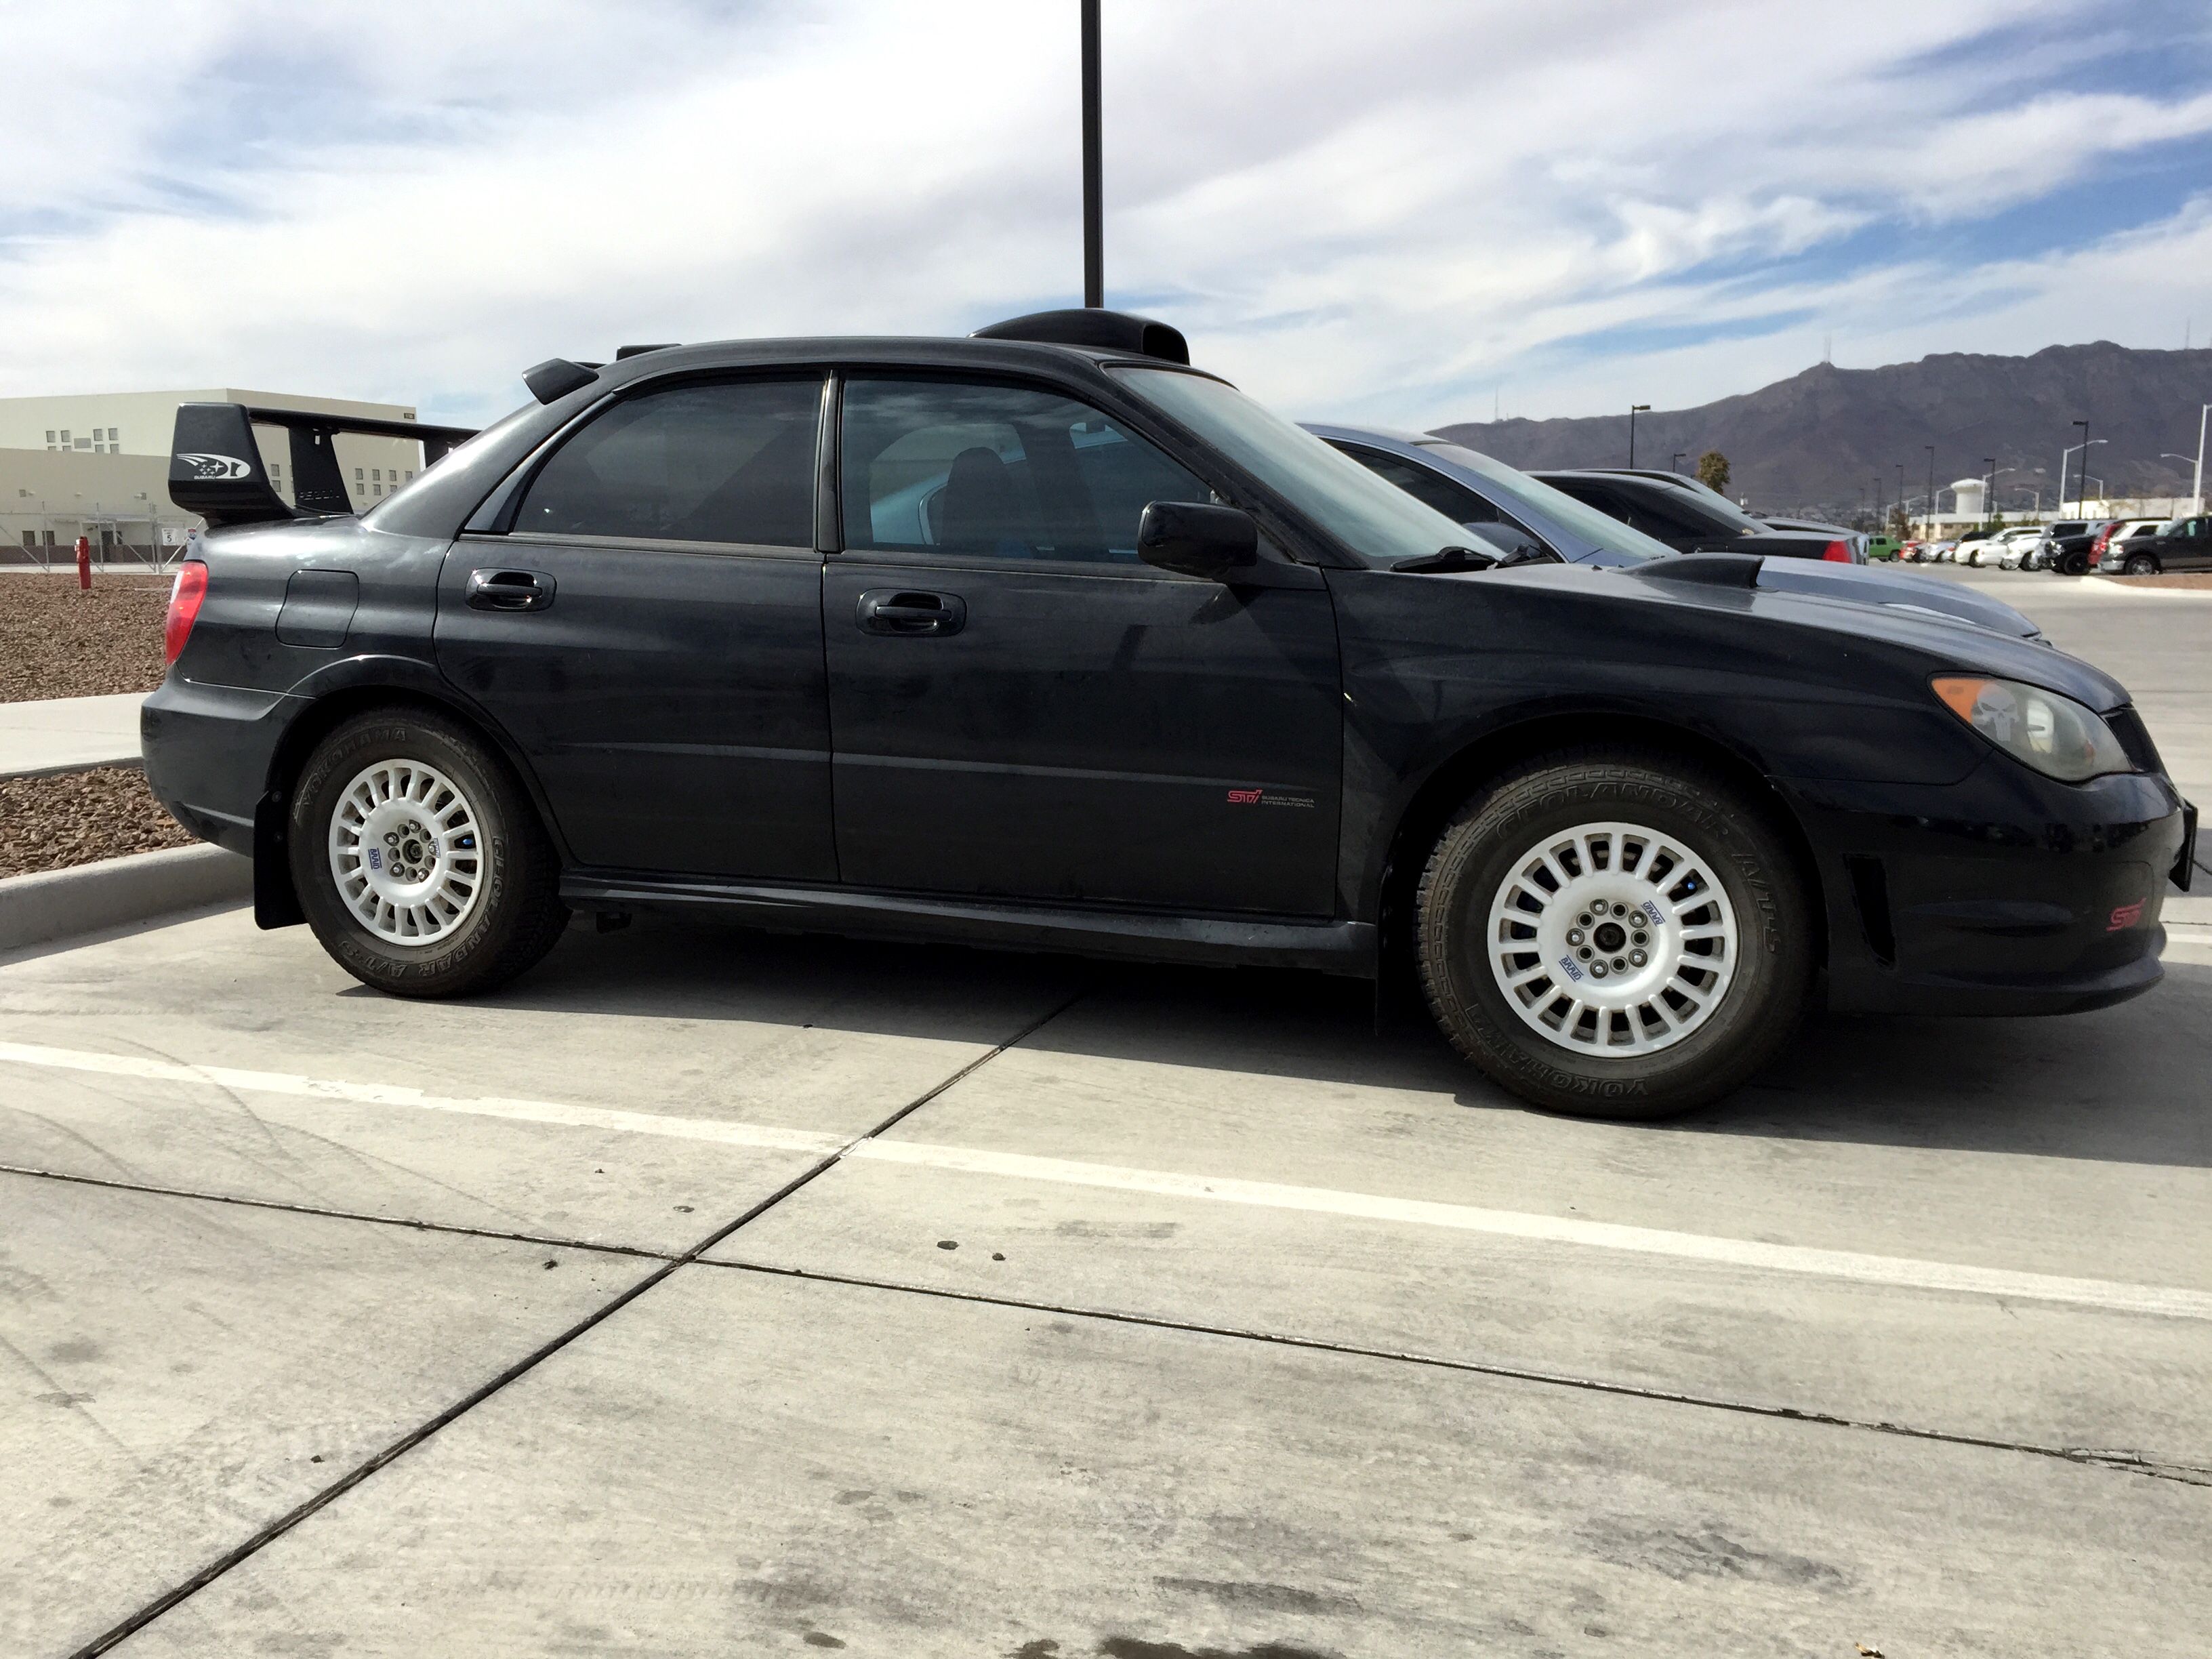 [/URL][URL="https://flic.kr/p/pKwoqD"]Untitled[/URL] by [URL="https://www.flickr.com/people/68571329@N05/"]RooT1985[/URL], on Flickr
[URL="https://flic.kr/p/q2sfjH"]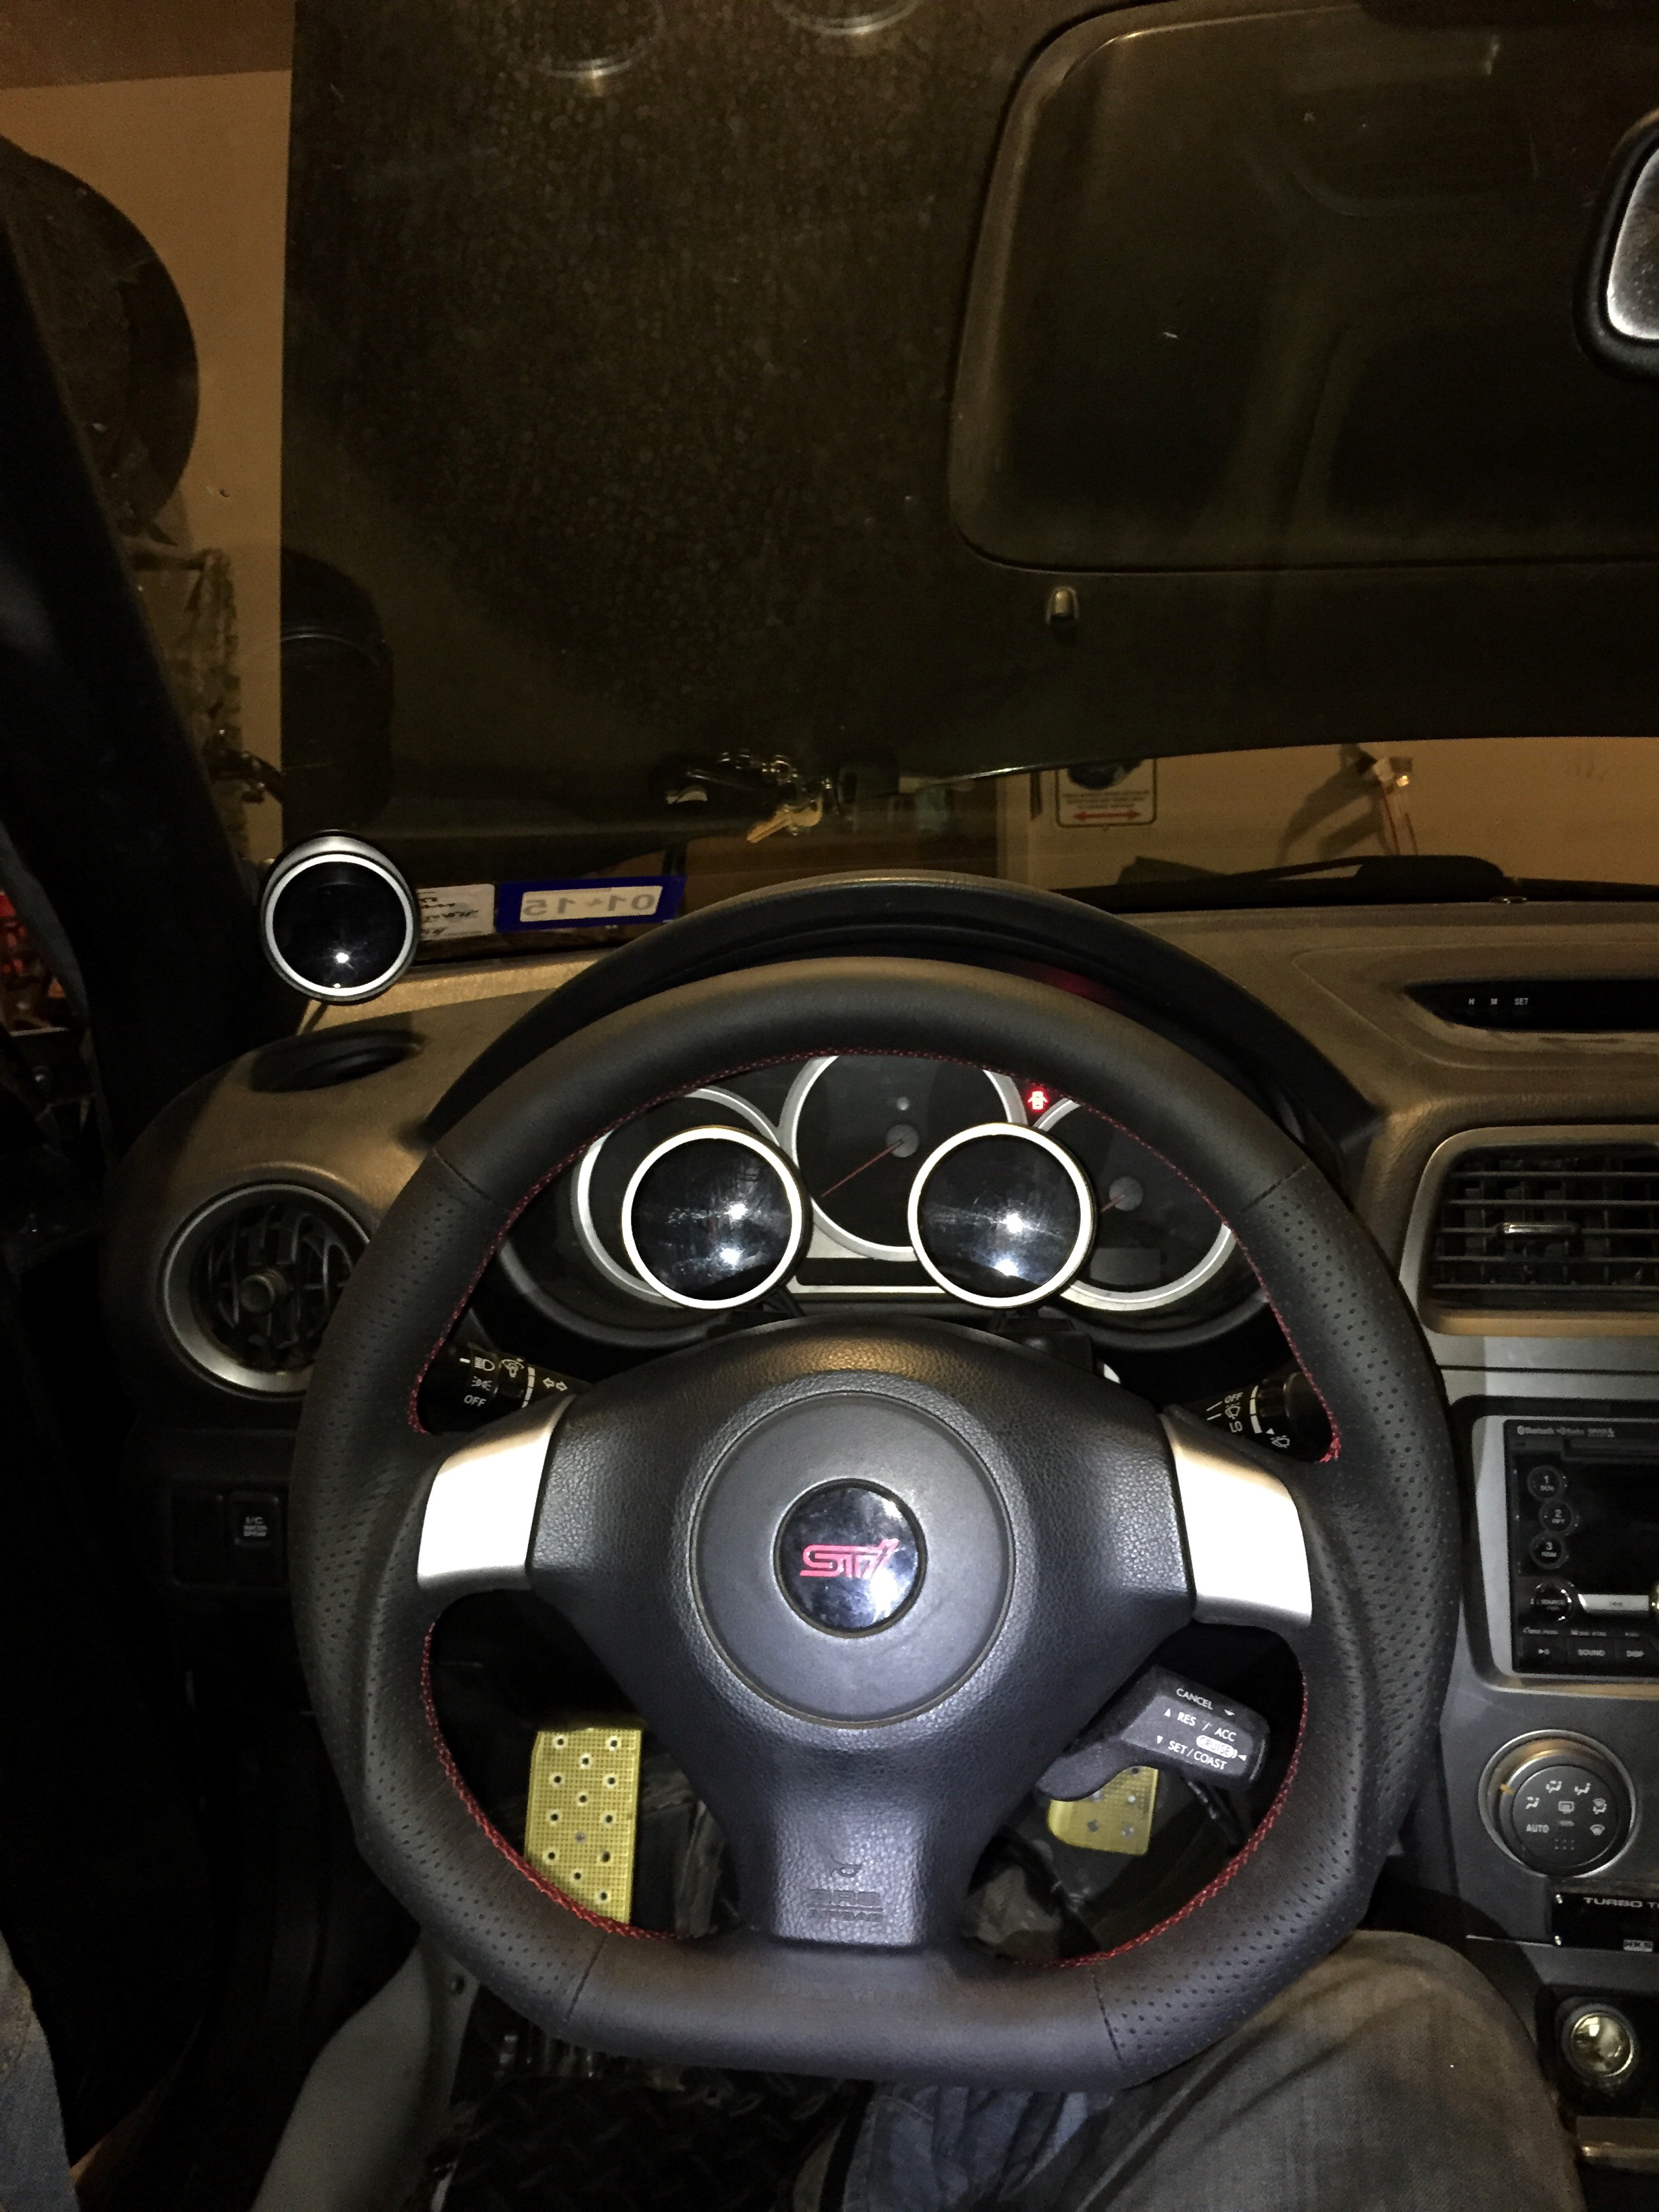 [/URL][URL="https://flic.kr/p/q2sfjH"]DADM Wheel[/URL] by [URL="https://www.flickr.com/people/68571329@N05/"]RooT1985[/URL], on Flickr
I changed the setup of the gauges a month or so ago with some permanently installed gauge pods, one on the bottom of the A-pillar (oil pressure) and one mounted up above the mirror (EGT, still just sitting there blinking until I get my headers swapped), the oil temp and boost gauges are still in the same places, mounted in the ATI steering-column pod. Changed up how my driving camera was mounted once again, used a few different parts from Ram mounts for the job; much more stable now and doesn’t restrict the movement of my rear-view mirror (at least not in a way that bothers me).
(INSERT PIC of camera and gauges)
The roof liner and everything else roof mounted (visors, oh-S*** handles and lights) are all out until I redo the roof liner since it started sagging really badly. I attempted to start sewing it up by hand but that was turning out to be WAY too tedious for me. I will eventually pull the covering off again and redo the contact adhesive correctly, then it will all go back in, though I will need to figure out a solution for the visors (maybe dyeing the cloth part and vinyl wrapping the mirror lids). Once that is all back in I’ll have to figure out a solution for the air-flow from the roof-vent, namely to direct it more to the sides than backwards. Another interior thing to get updated were my seat covers, got some almost WRB colored Neoprene covers from Wet Akole, took some picture sending for them to finish, but the results are pretty good. Still need to install the passenger seat’s cover however.
(INSERT PIC of roof liner when it’s eventually back in)
Speaking of the roof vent, we had a bit of a rainy season here and I developed a leak from the vent install. I ended up pulling the scoop and scraping out all the silicone caulking I had used. The stuff was essentially worthless for the job it seems, as it started breaking down from the heat. After cleaning it out and doing a bit of sanding, I wiped it all down with alcohol and refilled it with my favorite adhesive out there, E6000. I know this stuff works fine as it is what I used to seal al the rivets holding down the diffuser on the rear edge of the roof. Everything is back in and same as before, but unfortunately I think I will have to do a full pull of the roof vent itself and reinstall with the E6000 on all connecting surfaces as well as on top. This time I’ll try and get some more substantial help than my wife, maybe I’ll use bolts and nuts to hold the vent in place (and get it in tightly) while I install the rivets, just have to figure out a method of holding up the washers on the bottom (maybe tape will be the best bet).
On to today (6SEP2014); I’ve had some issues with the reverse lights being a little finicky at times, based on the symptoms I assumed it was the switch acting up, so I ordered one to put in. Just in time too, since the switch had completely stopped working. This is a huge PITA to change on a 6-speed if you don’t want to truly remove the tranny, which is how I did it; removed the tranny sub-frame and split the drive shaft (rather than allowing fluid to leak out of the hole the DS goes into; this is all the easy stuff though. Fun part was trying to replace the actual switch which required a crowfoot wrench I didn’t have, locating one was a PITA too, wasted 2 hours of the day running out to the Sears (looked like the single piece tools had been ransacked, and not a single crowfoot other than a $50 dollar package of ones I already had), ended up having to go farther out to Harbor Freight and bought a set there; 19mm crowfoot is now in my kit, along with some other spare metric crowfeet. After the time-drain I get all the necessary pieces removed and separated (sub-frame removed, tranny sitting on my second jack, driveshaft split, etc.).
Alright, finally get the bad switch out (easy enough to remove, one good twist with a double extension on the crowfoot and it spins out with one finger moving it) and decide I want to check both old and new electrically before the install. Set up my multimeter (to resistance) and check the old switch, open with nub out (correct), with nub in I’m getting mega-ohms of resistance (think I found the problem); new switch is open with nub out, and 1 Ohm with the nub in, new one is good. Now to try and get the new one installed (this is where I was hating life), took me almost 2 hours of struggling to get the bastard to start screwing in straight (very difficult to do when you can barely reach it with one arm over the tranny (literally could only touch it with my fingertips) and the other hand can only get to the knuckles between the tranny and tunnel). Finally get the switch in, and get it tight after some more finagling with the crowfoot and extensions; check out the reverse lights, they work beautifully again.
Since I was already in the area, I finally installed the Kartboy shifter bushings that had been sitting around forever and then installed the matching short throw shifter too. Feels a good bit more accurate now, no wonder though, the rear bushing was almost dry-rotted out (quite cracked on the surface, and very stretchy). Going to be fun to go drive around with this setup tomorrow.
Next was getting to the installing of the Borla exhaust that has been hanging around waiting. The modifications I have planned for it will happen at a later date (after I get a MIG welder for the garage), along with the other metal work projects I have in mind. And it’s in, pretty simple install, though it was a little beat up from the previous owner, and the slip fittings took a little massaging to get together right, but I heard no leaks like the P/O stated. It sounds pretty good when cold though.
(INSERT PIC of exhaust)
Next things on the agenda are starting to do some maintenance upgrades, which for now will consist of tire rotation, replacing the axle nuts (eventually, one thing at a time), fresh ball joints and swapping the struts for the lower mileage set in the closet. Also, I purchased another ’06 STi steering wheel for a project I’ve been thinking of doing, for now I’ll remain relatively tight lipped about it though I need to find a shop that welds Magnesium. Other than this I have some other parts arrived for the brake swap (fresh rebuild kit, a fresh color to paint the brakes in and some speed bleeders), a switched set of plugs for the diagnostic wires, a switched set of plugs for the clutch position switch (since the switch is being finicky lately and I will have an option of turning it back on and requiring the clutch to be pushed in) and I am in the process of changing out (read as deciding the colors) for some changes to the boots (e-brake and shifter) and center console (adding a matching cover) inside the car (working with Redline Goods on this).
1-9NOV2014: Alright, went to a cruise today, had some really bad luck though. Nailed a chunk of rebar and concrete that was hanging out on an exit. Destroyed both wheels on the driver’s side, and the front tire received a hole almost large enough to fist. I didn’t have the worst luck however, Bianca’s “twin” (another OBP ’06 STi but with gold BBS’ instead of silver like mine) blew their engine. Couple of the guys on the cruise convinced the owner to let me borrow 2 of his wheels (read as a temporary swap) to get me home. So now I more or less have forced my own hand at starting the 4/2 pot swap so I can run the old rally rims (and A/T tires) I had on Roxxy. So I started the swap on Tuesday night (4NOV, had to work on Sunday and Monday and it interrupted my planned starts), and as all installs seem to go, there are other irritating hiccups in the job.
These pics are both sides of the front wheel, notice the bend in the inside end is visible from the outer-side pic (about 60* clockwise):
DS Wheel Front by RooT1985, on FlickrAnd this is the rear wheel, outside section looked fine, inside not so much:
DS Wheel Rear by RooT1985, on FlickrLuckily I had already rebuilt the 4/2 pots (including a second rebuild of the front DS caliper after I snapped the bleeder off inside and the removal bit too, FML) and had them mostly ready to go in (other than rears, didn’t have them put back together yet). So I get the fronts off on Tuesday night, and Wednesday night I get the new DBA rotors, Porterfield pads, rebuilt caliper and the Goodridge lines all in on the front, but apparently stripped (discovered on Sunday (9NOV) night after getting everything buttoned up) the mounting holes on the DS caliper (yes, this caliper is the main gremlin on this job), so it’s time to use that Time-Sert kit I had waiting around (unfortunately I need to get another tool to use the taps, as the one I have isn’t correctly sized).
Thursday I get a good bit of the job done, get the calipers rebuilt, get most of the install done, fresh lines and rotors are in, but need to get the correct mounting bolts for the calipers (Brembos are M10x1.5m I needed M10x1.25 for the 2 pots) and longer bolts for the Grp N top hats on the struts I was swapping in. Bought all those bolts during lunch time on Friday so I could get hot on continuing the install after work. Friday night is spent getting the rear calipers completed and installed and starting on the strut swap in the rear. Start the swap to fresher struts with Grp N top hats and ½” spacers on the rear that night, get the most of the way through both sides.
Saturday I do the install of the front struts with Grp N top hats and ½” spacers, lose one of the nuts for the top hat in the black hole called an engine bay, need a replacement now. Installed Eibach camber bolts on all 4 struts, change my mind and remove them again. After this I do the install of the TSS trailing arms and trailing-arm-mounts, adjusted out about ¼” longer than stock (have the option to adjust them from stock - ~2” longer), whenever I snag and install the lifting King springs I’ll adjust them out longer. Lost about 5 hours of work time that day due to my boss’ birthday party/lunch at Olive Garden and the food baby I had thanks to their endless pasta bowl (bad enough I considered inducing vomiting). Once I finally get back to work (after I installed the second trailing arm) I decided to try refilling the brakes by myself and discover the bleeding system I bought requires a compressor (I don’t have one, not going to get one soon either) so on to researching how to build my own one man bleeder.
Sunday I go and pick up the parts to build my own bleeder (1 gal pump sprayer, some hose, some fittings and a fresh cap for the MC reservoir), get it built and do some fine tuning to get it to work correctly (mainly to get the cap to have a tighter seal). I refill the lines and get the wheels back on the car, and attempt to move the car, and it’s not moving, one of the calipers is inhibiting movement. I lift the car again and start doing some inspections and discover one of the bolts is stripped on the driver side front caliper, start working on it but the stripping gets worse. All the parts stores are closed by this point so I close up shop for the night as I have to work early on Monday morning.
11NOV2014: Install is complete, rebled the brakes again and did some adjustments on the brakes (like putting an extra washer on the mounting bolts for the front calipers to stop the touching between the bolt and the rotor’s face). After getting this all done I was able to finally take the car for a spin, fill the tires back up (two were sitting at ~20 PSI, one at ~10 PSI (went in the trunk as a full size spare) and the other two were sitting right below 30 PSI), and bed the brakes a bit. Unfortunately I have the symptoms of a CV joint that is on it’s way out on the front passenger side (grinding/scraping noise only on a left turn and only on one side with no evidence of rubbing anywhere). After going for a little drive I came home (inspected the front passenger side wheel at this time, again) and installed the DAMD steering wheel I had hanging out. It all looks pretty good now, love the feel of the wheel a lot.
Here are some pics of the car at the end of all of this and the steering wheel (and surrounding area).
[URL="https://flic.kr/p/pKwoqD"]
[/URL][URL="https://flic.kr/p/pKwoqD"]Untitled[/URL] by [URL="https://www.flickr.com/people/68571329@N05/"]RooT1985[/URL], on Flickr[URL="https://flic.kr/p/q2sfjH"]
[/URL][URL="https://flic.kr/p/q2sfjH"]DADM Wheel[/URL] by [URL="https://www.flickr.com/people/68571329@N05/"]RooT1985[/URL], on Flickr
gregroot198521- Ol' Dirty Bastard
- Posts : 98
Reputation : 2
Join date : 2012-03-20
Age : 38
Location : North El Paso/ Main Fort Bliss
![]()
![]()
Page 2 of 2 • ![]() 1, 2
1, 2
![]()


Page 2 of 2
Permissions in this forum:
You cannot reply to topics in this forum|
|
|